By: Rajendra Gupta | Updated: 2024-09-06 | Comments (1) | Related: > Azure SQL Managed Instance
Problem
Azure SQL Managed Instance automatically takes backups to suit your business requirements. However, if you need a manual backup for specific requirements, does Azure MI support it? Let's explore this in this tip.
Solution
Azure SQL Managed Instance (MI) offers automated database backups to restore your database to a specific point in time within the configured backup retention period. With the long-term retention policy, you can have the backup retention period configured for up to 10 years.
The default automated backup schedule is as follows:
- Take full backup every week.
- Take a differential backup every 12 hours.
- Take T-log backups every 10 minutes.
You can refer to Automated backups in Azure SQL Managed Instance to understand the automatic backups in detail.
Azure MI also supports taking manual native backups into Azure Blob Storage as the backup destination. Let's explore the steps required to take native backups in Azure MI.
Here is an overview of key terms used in this article:
- Storage account: Azure account containing all storage services.
- Container: It is like a folder or directory that groups blobs inside it.
- Blob: It is a file without any specific type and size. SQL Server supports page and block blobs. You can refer to Understanding block blobs, append blobs, and page blobs to understand the difference.
- URL: It is a uniform resource identifier for the container and backup files. Its format is http[s]://ACCOUNTNAME.blob.core.windows.net/<CONTAINER>/<FILENAME.bak>
- Credential: It is the SQL Server credential to access the blob storage for authenticating SQL Server requests to connect the Azure blob storage and read and write the objects outside the SQL Server.
Before we proceed further, if you do not have Azure Managed Instance, you can refer to the tip, Get Azure Managed Instance free to use for 12 months, and deploy the Azure MI instance free for 12 months.
Step 1: Azure Storage Account and Container
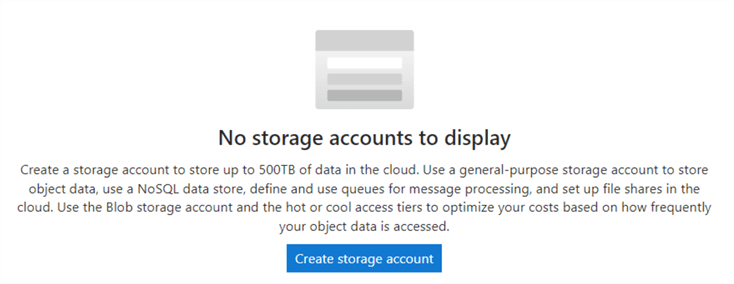
We need an Azure Storage account to configure the backups. Click on Storage accounts in Azure Services.
Click Create storage account.
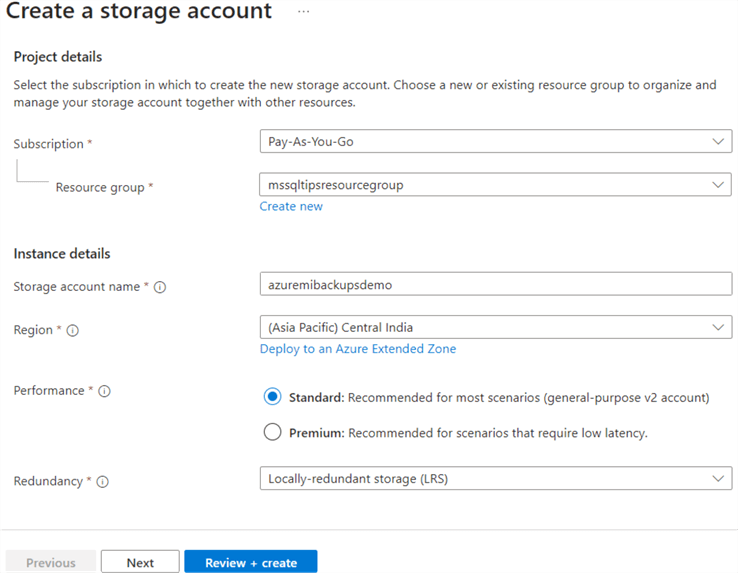
On the Create Storage Account page, do the following configuration:
- Subscription: Select a subscription from the drop-down menu.
- Resource group: Create a new resource group or choose an existing RG from the drop-down.
- Storage account name: Enter a unique storage account name between 3 to 24 characters (all lowercase).
- Region: Choose a suitable Azure region.
- Performance: Choose between Standard or Premium based on the description provided.
- Redundancy: Choose a redundancy model. The default value is Geo-redundant storage (GRS). As shown below, I will use the Locally Redundant storage for the demo.
Click on Review+create to start deploying the storage account.
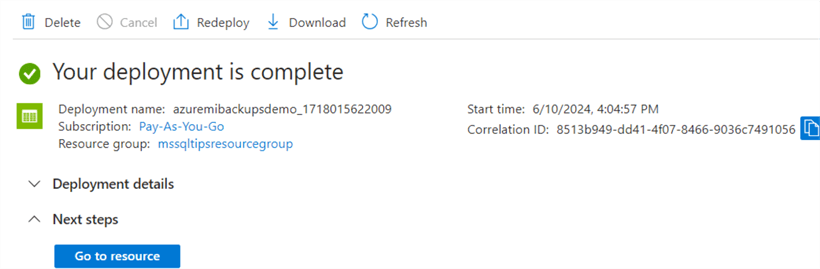
The image below shows the deployment was successful. Click on Go to Resource and view the storage account information.
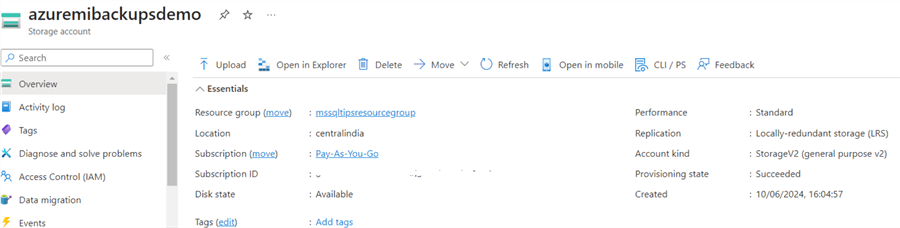
The image below shows details about the newly created storage account.
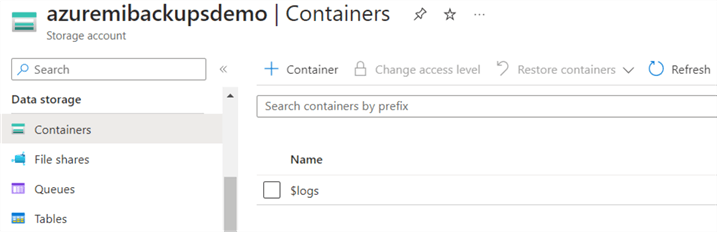
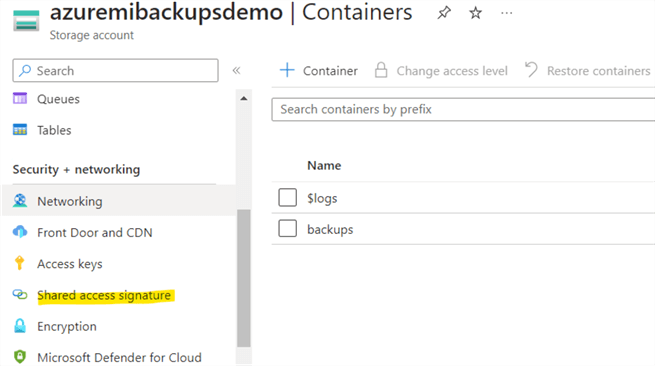
We need a container to store the backup files. Click on Containers in the Data storage section, as shown below.
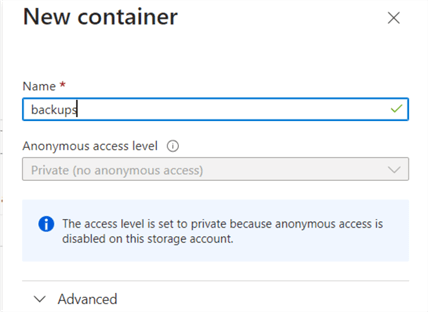
Click on +Container, specify a container name, and create it.
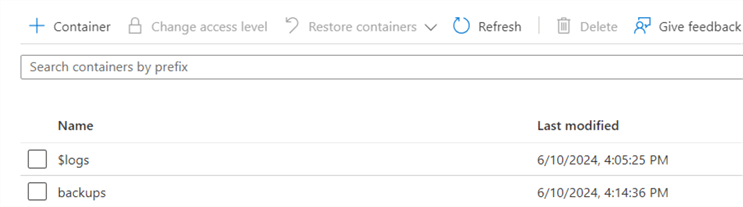
You can see a container named backups in the following screenshot.
SQL Server can access the Azure Storage account in two ways:
- Using the storage account name and access keys.
- Using Shared Access Signature (SAS) on a specific container.
A shared access signature is preferred and secured, as it provides granular control over the data stored in the container. Users can decide the kind of access, permissions, and validity of the access. Refer to the article, Grant limited access to Azure Storage resources using shared access signatures (SAS), to understand how SAS works.
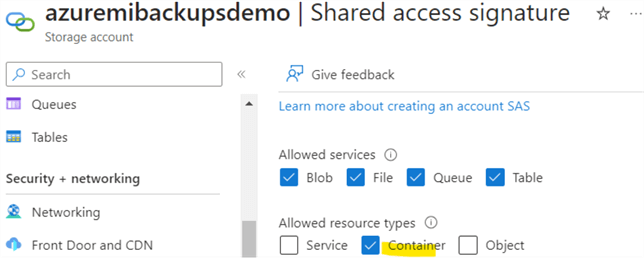
Click on Shared access signatures under Security + networking group.
Next, configure the properties on the Shared access signature page. Choose Container for Allowed resource types.
You can specify the SAS's start and expiry date/time. Note: You won't be able to take backups into the storage account container after the expiration date with the same SAS.
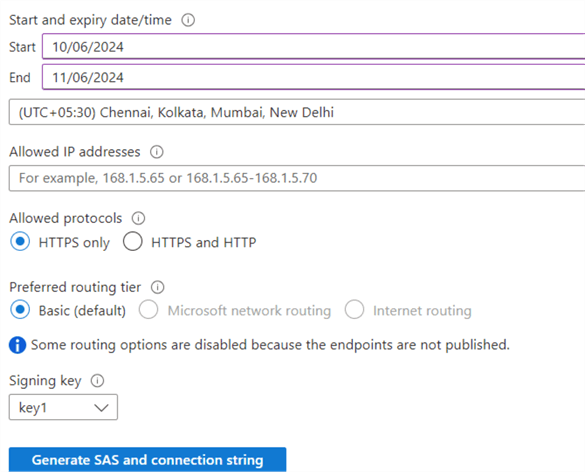
Click Generate SAS and connection string. It generates the connection string, SAS token, and SAS URLs. This URL is a uniform resource identifier for the backup file. It combines the storage resource URI, delimiter character, and SAS token.
We will use the connection string later in the article.
Step 2: Create a Credential in Azure Managed Instance
In this step, we will create a credential with the SAS to access the Azure blob storage container for storing the backup files.
In the below CREATE CREDENTIAL command, enter the following inputs:
- Credential name: It should be the URL of the Azure blob storage container. Its format is https://<<StorageAccount>>.blob.core.windows.net/<<ContainerName>>
- Secret: Use the SAS URL in the secrets obtained in the previous step.
CREATE CREDENTIAL [https://azuremibackupsdemo.blob.core.windows.net/backups]
   WITH IDENTITY = 'SHARED ACCESS SIGNATURE',
   SECRET = 'sv=xxxxxxxxxxxxxxxxxxxxxxxxxxxxxxxxxxxxxxxxxxxxxxxxxxxxxxxxxxxxx;
Step 3: Backup Azure Managed Instance Database
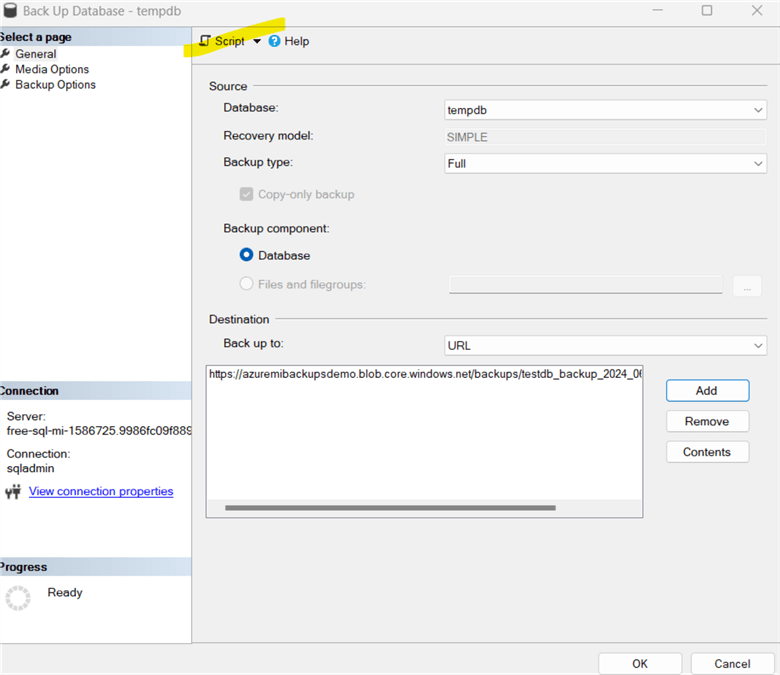
To take a database backup, right-click on the database in SSMS and go to Tasks > Backup.
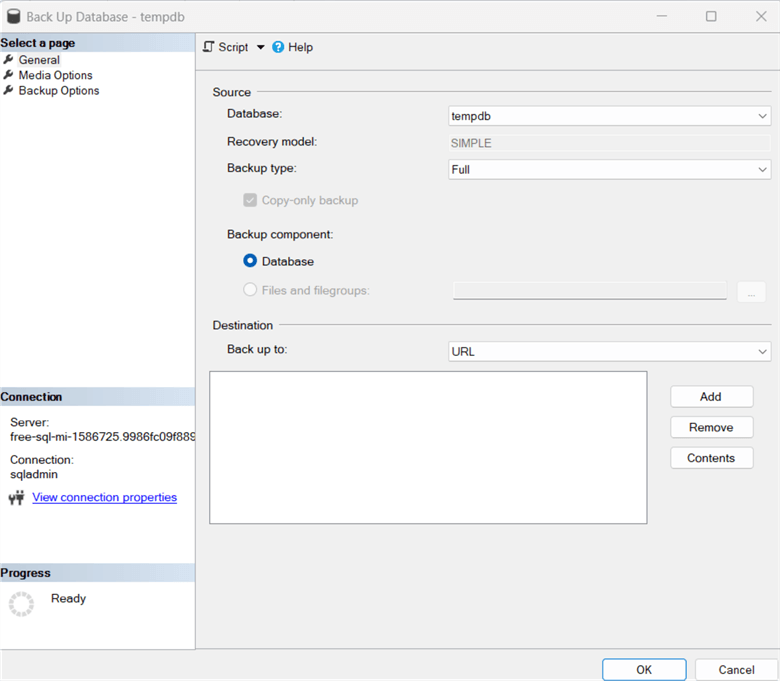
You can see the backup destination as a URL. In the on-premises SQL Server, we have options for backup to DISK or TAPE, but Azure MI does not support these.
Click Add, choose the Azure Storage container from the drop-down, and give a suitable name for the backup file.
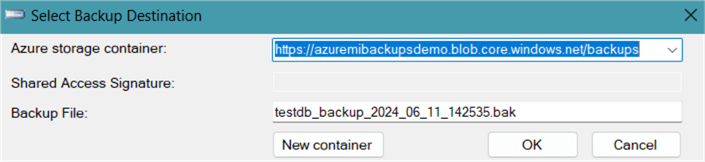
Click OK. Let's generate the script with the script option highlighted below.
It gives the script below. Note: The COPY_ONLY clause was automatically added. Azure MI relies on automated backups and does not allow you to take backups except for the COPY_ONLY backup, which does not interfere with the LSN sequence of regular backups. Refer to COPY_ONLY Backups with SQL Server for more details.
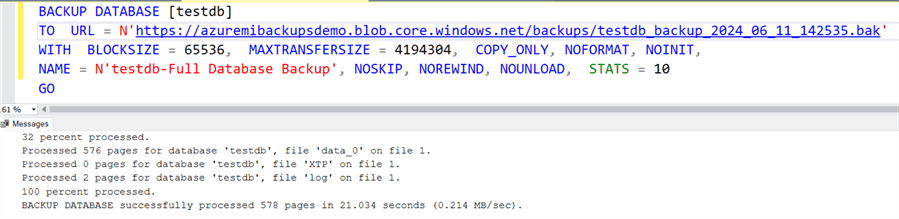
BACKUP DATABASE [testdb] TO  URL = N'https://azuremibackupsdemo.blob.core.windows.net/backups/testdb_backup_2024_06_11_142535.bak'
WITH  BLOCKSIZE = 65536,  MAXTRANSFERSIZE = 4194304,  COPY_ONLY, NOFORMAT, NOINIT,  NAME = N'testdb-Full Database Backup', NOSKIP, NOREWIND, NOUNLOAD,  STATS = 10
GO
We get an error when executing the script: "The backup operation for a database with service-managed transparent data encryption is not supported on SQL Database Managed Instance."

Let's see why we got this error and how to fix it.
Azure Managed Instance uses transparent data encryption using service-managed keys. If the database is encrypted with TDE using service-managed keys, COPY_ONLY backup is not supported. Azure MI does not allow this as it might violate the security policy and give a highly privileged user access to data.
You can verify the TDE key in the Azure MI instance. As shown below, it is configured as a service-managed key for my instance.

To get rid of the error and take a native copy_only backup, you can do the following:
- Use a customer-managed key to generate and store your keys in the Azure key vault. You will require this key for database restoration. If you lose the key, you cannot decrypt the database.
- Disable the encryption to take unencrypted database backup.
Note: Automatic backups with service-managed keys are always recommended. Disable encryption only if you have the use case for it. Be careful in the Production environment and always encrypt the database to avoid misuse.
Let's do the manual backup with disabling the encryption.
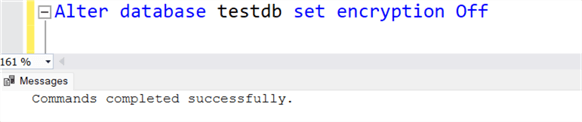
To disable encryption, use the following command:
alter database testdb set encryption off
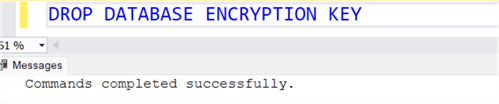
Drop the database master encryption key.
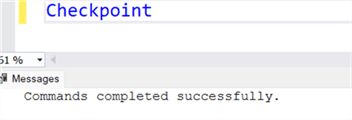
Perform a manual checkpoint.
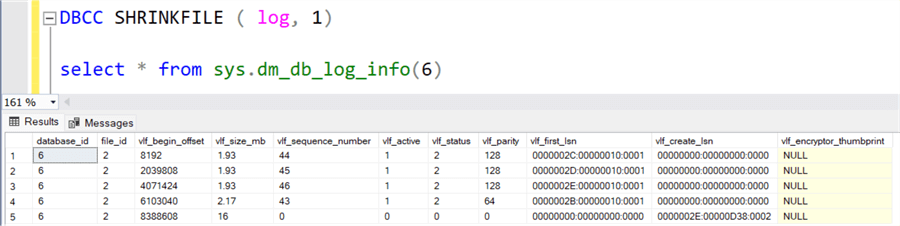
Use sys.dm_db_log_info to check if the thumbprint encrypts the active VLF. Currently, we see VLF is encrypted, as highlighted below.

Shrink the logs using the DBCC SHRINKFILE(<logName>,1) and verify the active VLF and thumbprint. We see NULL in the vlf_encryptor_thumprint column.
Now, you can run the backup script, which will be completed successfully.
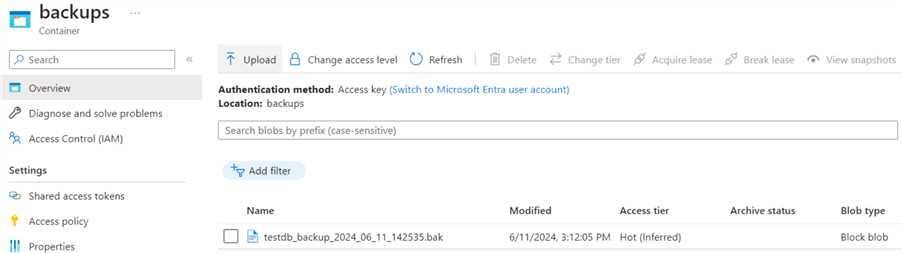
Verify the backup file (testdb_backup_2024_06_11_142535.bak) in the storage container.
Note: You may get an error:
If so, check the SAS. It might not be valid, or there are some issues with the SAS token. Refer to this URL if you still get this error message when taking a COPY_ONLY backup.
If your credential expires due to the SAS token, you must drop it and create it again. To drop the credential, you can use the following command.
Drop Credential <<Credential name>>
Next Steps
- Test the manual backups for Azure SQL Managed Instance in your test environment.
- Deploy and explore the Azure SQL Managed Instance free for 12 months.
- You can review existing tips for Azure.
- Read the FAQs for Azure SQL Managed Instance for free if you have any questions.


About the author
 Rajendra Gupta is a Consultant DBA with 14+ years of extensive experience in database administration including large critical OLAP, OLTP, Reporting and SharePoint databases.
This author pledges the content of this article is based on professional experience and not AI generated.
View all my tips
Article Last Updated: 2024-09-06