By: Hristo Hristov | Updated: 2024-10-09 | Comments | Related: > Application Development
Problem
Working with APIs is an important part of the life of data professionals. We are frequently tasked with either pulling data from or pushing data to some system or performing some other interaction programmatically. The various APIs out there can sometimes make this process more difficult than it should be. How can we make our lives easier when working with APIs? How can we make the interaction more standardized and robust?
Solution
To eliminate the dependency on different API clients and work more efficiently with any given OpenAPI-described API, we can utilize a command line tool called Kiota by Microsoft. Using Kiota, we can generate our own API clients for efficient API interaction. On top of that, we can use popular programming languages. For this article, we will use Kiota with Python.
Environment and Project Setup
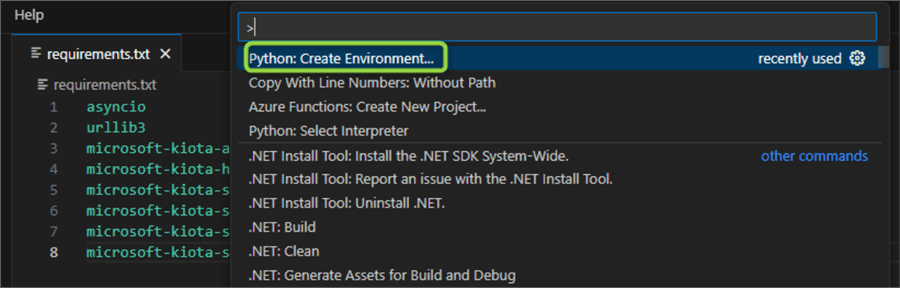
First, create a project folder to contain the namespace of the project. Open it in VS Code and create an empty requirements.txt file. Then paste the following lines into it:
asyncio
urllib3
microsoft-kiota-abstractions
microsoft-kiota-http
microsoft-kiota-serialization-json
microsoft-kiota-serialization-text
microsoft-kiota-serialization-form
microsoft-kiota-serialization-multipart
Next, hit Ctrl+Shift+P and choose Python: Create Environment…
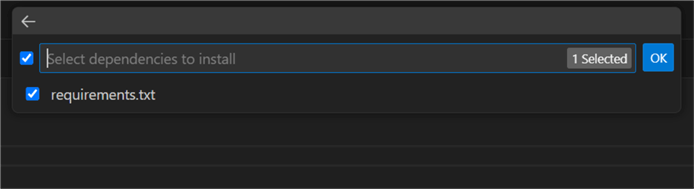
Follow the prompts for creating a virtual environment. Make sure to check
requirements.txt so the
environment agent will install the required Python packages directly:
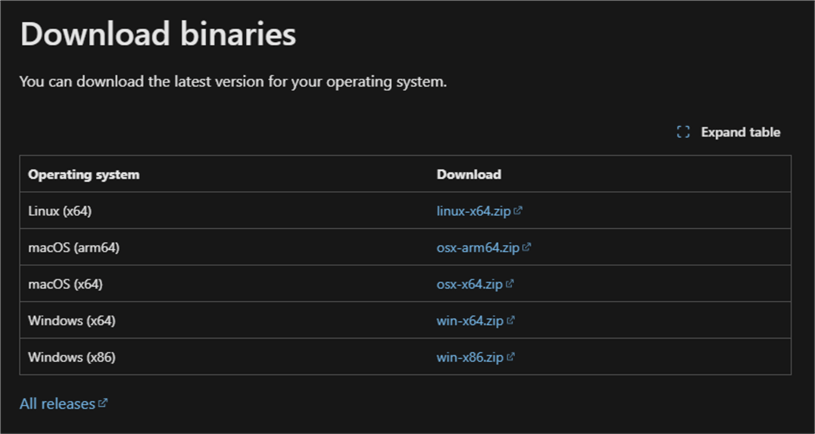
Finally, go to the Kiota installation page and download the latest version for your operating system:
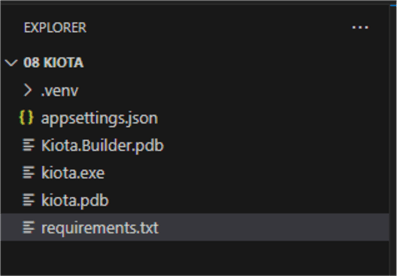
Unzip the contents of the archive in the project directory. After you have created the environment and unzipped Kiota, this is what the namespace should contain:
Generate the API Client
Find an API
Next, we must find the OpenAPI specification of the API we want. OpenAPI, previously known as Swagger, is the de facto standard for describing, creating, and consuming web services in a machine-readable way. For the sake of our example, I have chosen to use the API of APIs.guru. This API is a handy directory of web APIs described according to the OpenAPI format.
To start generating the client, in the VS Code terminal, type:
curl -o openapi.yaml
https://api.apis.guru/v2/openapi.yaml
This will get the openapi.yaml definition file from the APIs.guru server and save it in your current working directory. If the command does not work for you, head to their API documentation page. You will see the download button for the OpenAPI definition of their API. Right-click on it and save the .yaml file in your project directory:

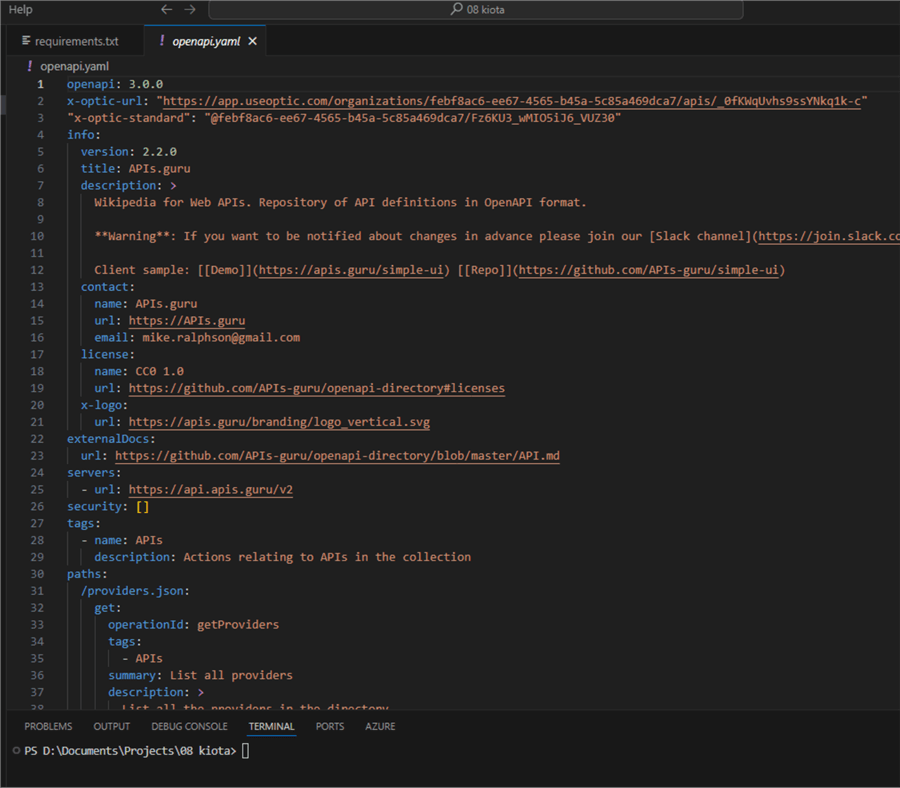
Check API Definition
A quick check of the .yaml file reveals the APIs.guru portal web API definition:
At this point, we are ready to generate our API client using Kiota.
Generate the Client
In the VS Code terminal from your current working directory, issue the following command:
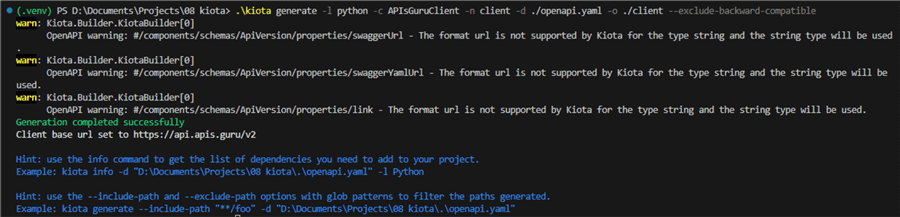
.\kiota generate -l python -c APIsGuruClient -n client -d ./openapi.yaml -o ./client --exclude-backward-compatible
Using the Kiota command line tool
generate command, we are:
-l: Generating a client for the Python language.-c: The class name will be called APIsGuruClient.-n: The name of the containing subfolder will be called client.-d: The source OpenAPI definition file is in the current directory and called openapi.yaml.-o: The output will be in the client subfolder in the current directory.--exclude-backward-compatibleflag: This is for optimization purposes because we are generating our client for the first time. For subsequent client generations and after potential changes to the API definition, we can omit it to ensure our client will stay backward compatible.
Running the command may produce several ignorable warnings. At the end, we should see "Generation completed successfully":
At this point, we have a custom Python client to interact with our API! Let us see how to use it.
Using the Client
Let us write a simple script to access some of the services from the APIs.guru API.
01: import asyncio
02: from kiota_abstractions.authentication.anonymous_authentication_provider import (
03:     AnonymousAuthenticationProvider)
04: from kiota_http.httpx_request_adapter import HttpxRequestAdapter
05: from client.a_p_is_guru_client import APIsGuruClient
06:
07:
08: async def main():
09:     auth_provider = AnonymousAuthenticationProvider()
10:
11:     request_adapter = HttpxRequestAdapter(auth_provider)
12:
13:     client = APIsGuruClient(request_adapter)
14:
15:     # GET /providers.json
16:     all_apis = await client.providers_json.get()
17:     [print(api) for api in all_apis.data]
18:     print('\n')
19:
20:     # GET /metrics.json
21:     api_metrics = await client.metrics_json.get()
22:     print(f'Total count of cataloged APIs: {api_metrics.num_a_p_is}')
23:     print(f'Total count of endpoints: {api_metrics.num_endpoints}')
24:     print('\n')
25:
26:     # GET /{provider}.json
27:     zoom_api = await client.by_provider_id(provider_id='zoom.us.json').get()
28:     print(zoom_api)
29:
30: asyncio.run(main())
This is what we are doing here:
- 01 – 05:
- 01: Import asyncio to be able to run coroutines.
- 02: Import the anonymous authentication provider. The APIs.guru API does not require authentication; therefore, we use this provider. Kiota supports other authentication options such as access token, API key, bearer token, or Microsoft identity (Entra ID) authentication.
- 04: Import the http request adapter.
- 05: Finally, import our own API client we generated earlier.
- 08: Define an async function
- 09: Define an anonymous authentication provider.
- 10: Define a request adapter. This instance of
HttpxRequestAdapterwill take care of issuing our requests to the base URL (https://api.apis.guru/v2), among other things. - 11: Define a client, which is an instance of our API client we generated earlier.
- 15 – 18: Using the providers.json endpoint (now the
providers_jsonproperty), we can get a list of all APIs cataloged in APIs.guru and print their names. - 20 – 23: Using the metrics.json endpoint (now the
metrics.jsonproperty), we can get some interesting statistics on the APIs available on the platform. - 25 – 27: Using the parametrized provider.json endpoint (now the
by_provider_id()function), we can get information on the Zoom API.
Let us run this code:
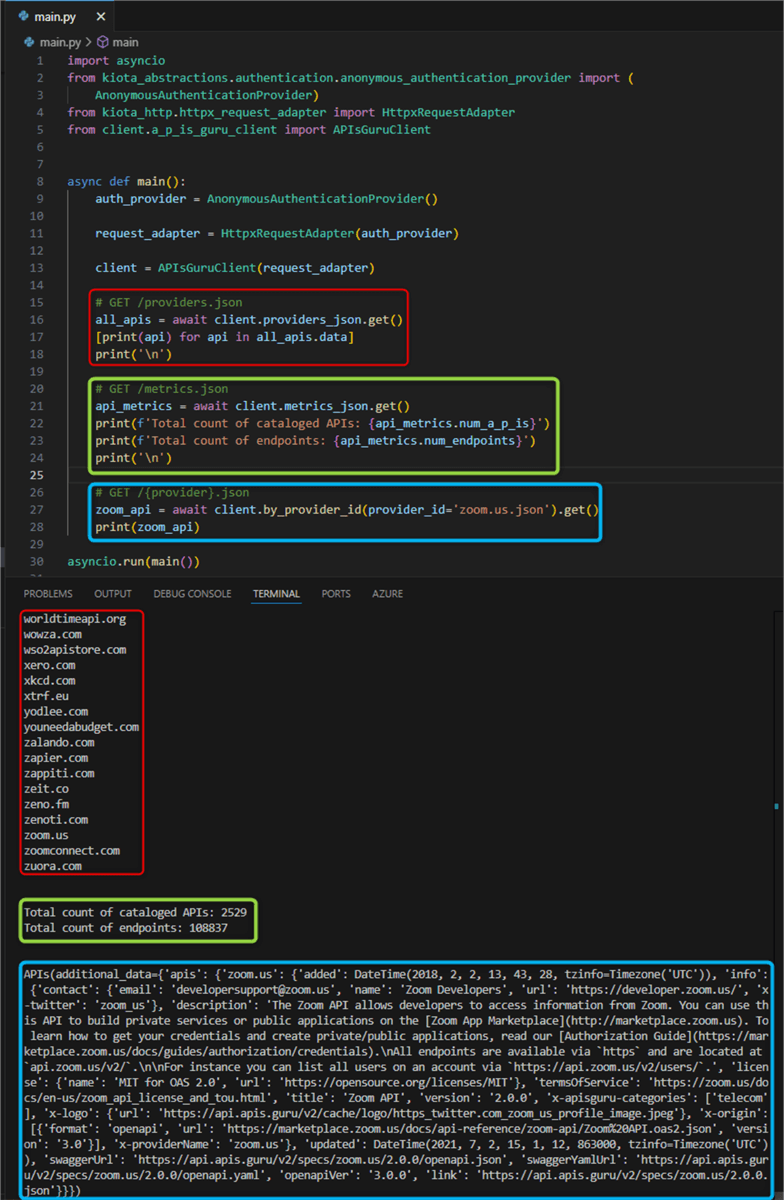
In the terminal, we can observe the data returned from the calls to the APIs.guru API using our custom Python API client:
- In Red: A list of all APIs. Only the bottom few results are visible here (the list is long).
- In Green: Total count of APIs and endpoints.
- In Blue: An
APIobject containing data on the zoom.us API.
Now, the responses from the various API endpoints are easily available in our code for downstream consumption.
Conclusion
Using the Kiota command line tool, we have successfully generated a Python API client from an OpenAPI-described API. Having our own client provides a strongly typed experience facilitating the use of the API endpoints from our own code. We can use our client in any application and eliminate the need to call different clients or call the API directly. In this way, we enable the development of more streamlined solutions.
Next Steps
- OpenAPI
- APIs.guru
- Kiota documentation
- Python coroutines
- Build API clients for Python with Microsoft identity authentication


About the author
 Hristo Hristov is a Data Scientist and Power Platform engineer with more than 12 years of experience. Between 2009 and 2016 he was a web engineering consultant working on projects for local and international clients. Since 2017, he has been working for Atlas Copco Airpower in Flanders, Belgium where he has tackled successfully multiple end-to-end digital transformation challenges. His focus is delivering advanced solutions in the analytics domain with predominantly Azure cloud technologies and Python. Hristo's real passion is predictive analytics and statistical analysis. He holds a masters degree in Data Science and multiple Microsoft certifications covering SQL Server, Power BI, Azure Data Factory and related technologies.
This author pledges the content of this article is based on professional experience and not AI generated.
View all my tips
Article Last Updated: 2024-10-09