By: Koen Verbeeck | Updated: 2024-11-08 | Comments | Related: > Microsoft Fabric
Problem
We have implemented a warehouse in Microsoft Fabric, exposing the data to a third party using the GraphQL API. We can query the data without issues, but would it be possible also to make changes to the data using the GraphQL API?
Solution
In the tip, API for GraphQL in Microsoft Fabric, the GraphQL API feature of Microsoft Fabric was introduced. With GraphQL, you can build a data access layer for querying your Fabric data (supported sources are warehouses, lakehouses, and mirrored databases) through an API interface. The tip, Query Microsoft Fabric GraphQL API from an External App, shows how to query this API from a C# application, and the tip, Relationships with the Microsoft Fabric GraphQL API, explains how to model relationships in the GraphQL schema.
For this tip, we will dive into more advanced features of the GraphQL API in Fabric. We will discover how to use mutations to create, update, or delete data in Fabric. Keep in mind that at the time of writing, the GraphQL functionality of Fabric was still in preview, so features and general look and feel may have changed by the time you read this.
Apply CRUD Operations Using Mutations
Sample Data
Before we get started, we need a warehouse with some sample data. To create a warehouse, follow the steps outlined in this tip: What are Warehouses in Microsoft Fabric? The following script creates a table, adds a primary key, and inserts three records of sample data:
CREATE TABLE dbo.Articles(
     articleID INT NOT NULL
    ,articleName VARCHAR(100) NOT NULL
    ,articleTopic VARCHAR(100) NOT NULL
    ,articlePublished BIT NULL
    ,articleLink VARCHAR(100) NULL
);

ALTER TABLE dbo.Articles
ADD CONSTRAINT PK_articles PRIMARY KEY NONCLUSTERED (articleID) NOT ENFORCED;
INSERT INTO dbo.Articles
(
     articleID
    ,articleName
    ,articleTopic
    ,articlePublished
    ,articleLink
)
SELECT 1, 'What is Microsoft Fabric?', 'Microsoft Fabric', 1, 'https://www.mssqltips.com/sqlservertip/7739/learn-about-microsoft-fabric-for-data-analytics/'
UNION ALL
SELECT 2, 'API for GraphQL in Microsoft Fabric', 'Microsoft Fabric', 1, 'https://www.mssqltips.com/sqlservertip/8077/api-for-graphql-in-microsoft-fabric/'
UNION ALL
SELECT 3, 'Query Microsoft Fabric GraphQL API from an External App', 'Microsoft Fabric',0, NULL;
I'm aware the table is not properly normalized and is only for demonstration purposes. The primary key is added to the table – even though it isn't really supported – because it's listed in the documentation as a prerequisite to get mutations automatically created in the GraphQL schema when the source is a warehouse.
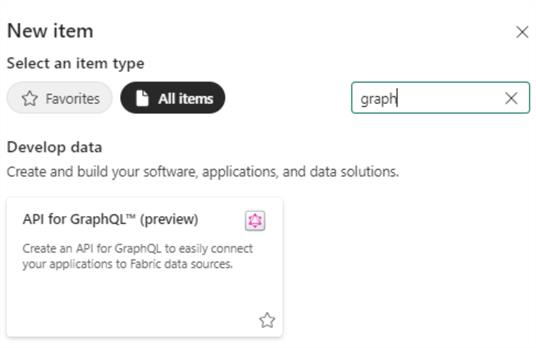
Next, we're going to create a GraphQL API for our warehouse. In your workspace, click New item and filter down to find GraphQL among all the options.
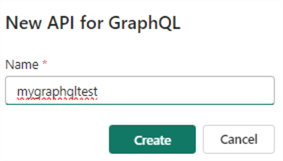
Give the new GraphQL API a name:
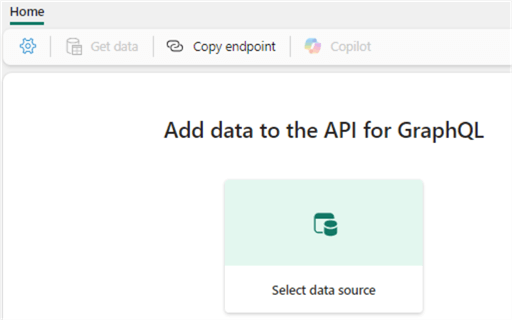
Click Select data source to start the wizard:
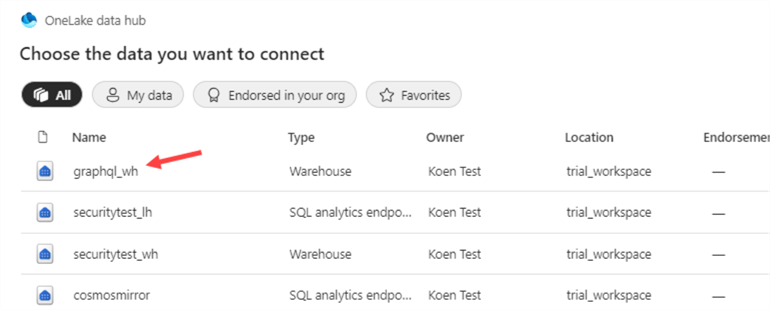
From the list, select the recently created warehouse with the sample data from the previous steps, and click Connect at the bottom of the screen:
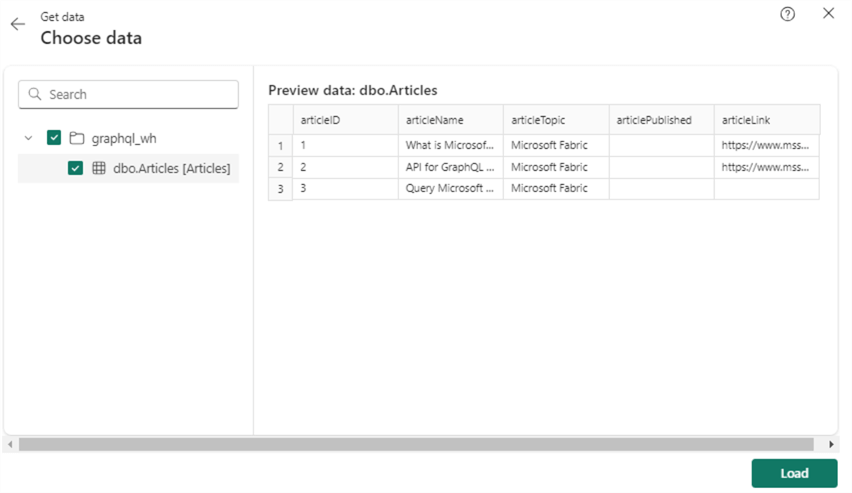
The wizard will load the tables from the warehouse. Select the Articles table from the list and click Load.
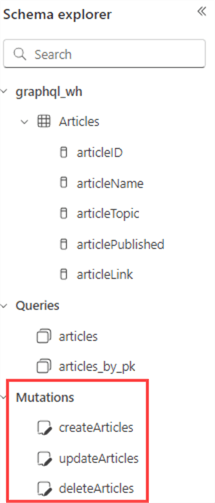
It might take some time for the GraphQL schema to load in the Schema Explorer. We can see three mutations have been added for our table: createArticles, updateArticles, and deleteArticles.
Querying the data is discussed in the following tips: API for GraphQL in Microsoft Fabric and Query Microsoft Fabric GraphQL API from an External App. In the next sections, we'll focus on how to change data using the GraphQL interface.
Create New Items
Let's start with the create mutation, which is like an INSERT statement in SQL. Instead of a query, we now need to use the mutation keyword. Luckily, the Fabric autocomplete will help us write the GraphQL statement:
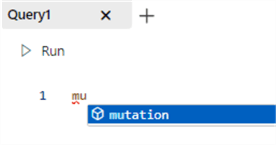
You will only be able to select from the existing mutations that were generated when we selected the source data:

When a mutation is selected, the autocomplete will add the necessary brackets:
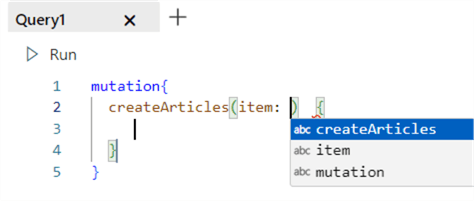
To create a new article with the mutation, we need to specify a value for each column of the table inside the item object. After the item, we put the keyword result, so the actual result from running the mutation is returned. This means the mutation will take on the following format:
mutation{
    my_create_mutation(item:
        {
            column1: "some value",
            column2: "another value",
            …
        }
    ){
         result
    }
}
Since identity constraints are not supported by Fabric, we need to provide a value for the article ID. The mutation becomes:
mutation{
    createArticles(item:
        {
            articleID: 4,
            articleName: "Test Article",
            articleTopic: "SQL Server",
            articlePublished: false,
            articleLink: null
        }
    ){
         result
    }
}
The result item will indicate if the operation was successful or not:
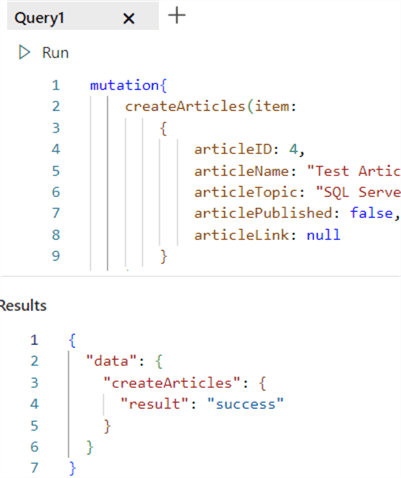
When we check the table, we can see a record has been added:

Update an Existing Item
With mutations, you can also update the contents of a record, like a SQL UPDATE statement. The mutation takes on the following format:
mutation{
    my_update_mutation(
        pk_column: some_value,
        item: {
            column_to_update: "new value",
            other_col_to_update: "other value"
        }
    ){
        result
    }
}
In contrast with the create mutation, you need to specify a value for the primary key column when you want to use an update mutation. That's why a primary key constraint is required on the source table (even though it is not enforced). When you're writing the code for the mutation, the Fabric autocomplete will put the primary key column in the correct place:

Let's suppose we want to publish an article, which means we need to set the articlePublished column to true and specify a value for the articleLink column. This would result in the following query:
mutation{
  updateArticles(articleID: 3 ,item:
  {
    articlePublished: true,
    articleLink: "some HTTP URL"
  }
  )  {
   result
  }
}
Like before, the result keyword is added.
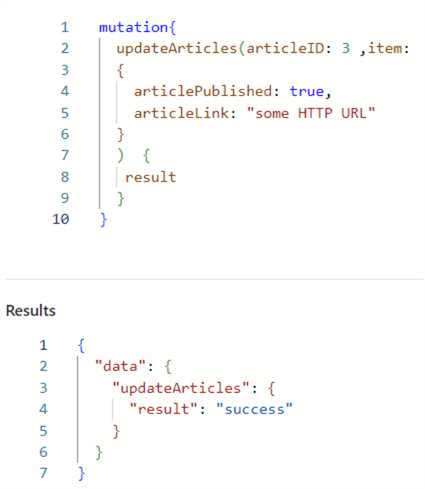
We can verify the results of the mutation by retrieving the values for the article with an ID equal to 3.

Delete an Item
The last operation we can perform with mutations is deleting a record from the table. This mutation takes on the following query format:
mutation{
    my_delete_mutation(
        pk_column: some_value
    ){
        result
    }
}
Unlike the create and update mutation, we don't need to specify an item. We only need a value for the primary key column. If we want to delete the test record created earlier, we can execute the following query:
mutation{  deleteArticles(articleID: 4)  {
     result
  }
}
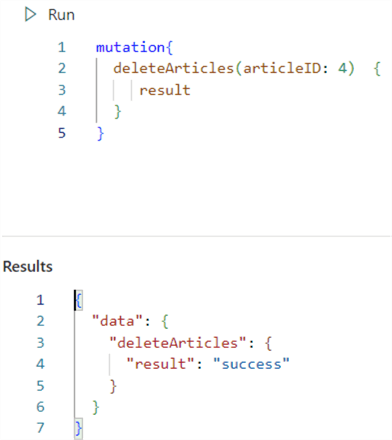
When we query the table, we can see the record is gone:

Next Steps
- Mutations are a powerful way to programmatically perform CRUD operations against Fabric data from external applications. You can follow the steps outlined in this tip to try it out yourself. Make sure to have a Fabric-enabled workspace (for example, by using the free Fabric trial).
- In the Microsoft Ignite session about the Microsoft Fabric GraphQL API, you can view a demo about using mutations.
- You can find all Fabric-related tips in this overview.
About the author
 Koen Verbeeck is a seasoned business intelligence consultant at AE. He has over a decade of experience with the Microsoft Data Platform in numerous industries. He holds several certifications and is a prolific writer contributing content about SSIS, ADF, SSAS, SSRS, MDS, Power BI, Snowflake and Azure services. He has spoken at PASS, SQLBits, dataMinds Connect and delivers webinars on MSSQLTips.com. Koen has been awarded the Microsoft MVP data platform award for many years.
This author pledges the content of this article is based on professional experience and not AI generated.
View all my tips
Article Last Updated: 2024-11-08


