By: Sebastiao Pereira | Updated: 2024-11-05 | Comments | Related: > Reporting Services Development
Problem
Report Viewer was originally developed for the .NET Framework. As the industry shifts towards .NET Core, developers who have traditionally relied on this tool have faced challenges displaying reports within their applications due to compatibility issues. Is it possible to display a report from SQL Server Reporting Services (SSRS) in a .Net Core Application?
Solution
Before we get started, let's cover a few things you should know first.
Terms and Definitions
.Net Framework
Released in 2002, the .NET Framework is the original implementation of a software development framework for building and running applications on Windows. The last release was in August 2022.
.Net Core
Introduced in 2016, .NET is a free, cross-platform, open-source developer platform for building many kinds of applications. It can run programs written in multiple languages, with C# being the most popular. It relies on a high-performance runtime that is used in production by many high-scale apps. The release cadence for .Net Core is scheduled to be annual.
SQL Server Reporting Services (SSRS)
SSRS is a server-based report generating software system from Microsoft that allows you to create, deploy, and manage a wide range of reports, including tabular, graphical, and free-form reports, supporting a variety of data sources and can render reports in multiple formats. It also can be accessed using its built-in APIs.
Report Viewer
Report Viewer is a control that enables embedding SSRS reports into web and Windows applications which provides a way to view, navigate, print, and export reports. It was developed by Microsoft to run under .Net Framework platform.
Report Server API URI Components
A REST API request/response pair can be separated into components: {URI-scheme} :// {URI-host} / {resource-path} ? {query-string} {format}
- URI-scheme: http or https
- URI-host: In the format "Computer_Name:Port"
- resource-path: Path to access the report server API. In our case, "/ReportServer/Pages/ReportViewer.aspx"
- query-string: The name of the report and parameters, in the format "/FOLDER_NAME/REPORT_NAME?PARAMETER_ONE=X&PARAMETER_TWO=Y"
- format: PDF, Word, Excel, PowerPoint, TIFF, and others, in the format: "&rs:Format=choose_one_format"
Accessing Reports from SSRS in .Net Core Applications
In this tip, I will assume that you already have SSRS installed and running, with at least one report on it, to be used in your example. The report I will use is for issuing a medical exam request form following the local official standard using its record Id as a parameter.
Writing the URI of the Report
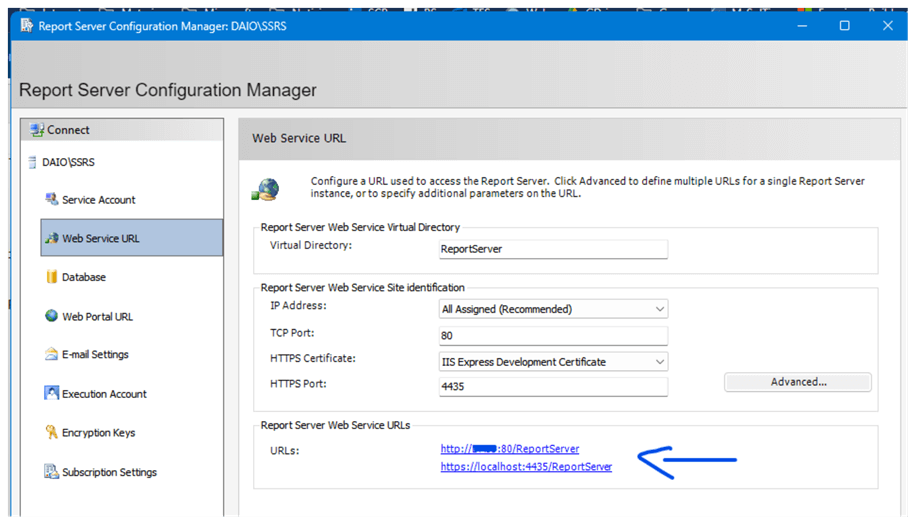
To find out details about your Report Server installation, go to the Report Server Configuration Manager and choose the Web Service URL page. Here you can find the defined URLs for the Web Service:

Choose one to start writing our URI. Add at the end "/Pages/ReportViewer.aspx?"
In my case, the URI will look like "https://localhost:4435/ReportServer/Pages/ReportViewer.aspx?"
The next step is to select your report. Click on one of the options above, which will open the Report Server's directories list in your browser. Navigate to the desired directory and select the report you want. In my case, there is only one parameter to fill out, which is 'MedTestSolicItem'.

In the web address of the image above, the character "/" is represented in its HTML format as "%2f".
In my URI variable, it is time to fill out the query-string section, adding the directory name "/BitMedical", the report name "/GuiaSPSADTExames", and the parameter name with the variable that is going to store the Item Id number "&MedTestSolicItem={medTestSolicItem}", and finally the format "&rs:Format=pdf". If you have additional parameters, continue adding them as "¶meter_name={variable_name}" before the format part.
My final URI: https://localhost:4435/ReportServer/Pages/ReportViewer.aspx?/BitMedical/GuiaSPSADTExames&MedTestSolicItem={medTestSolicItem}&rs:Format=pdf
Creating a Project in Visual Studio
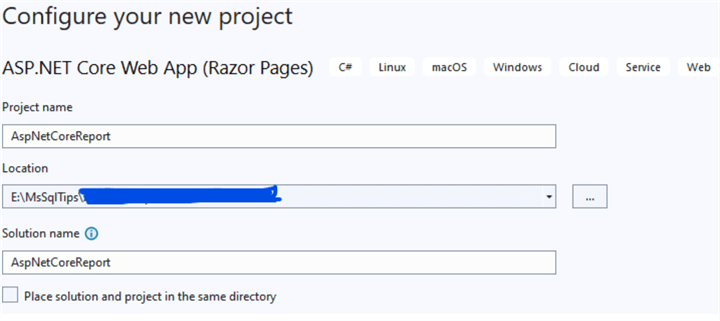
Open Visual Studio. Choose the option Create a new project. In Search for templates, type "asp net core" and choose the option ASP.NET Core Web App (Razor Pages) C#. Give a name to your project and choose its location.

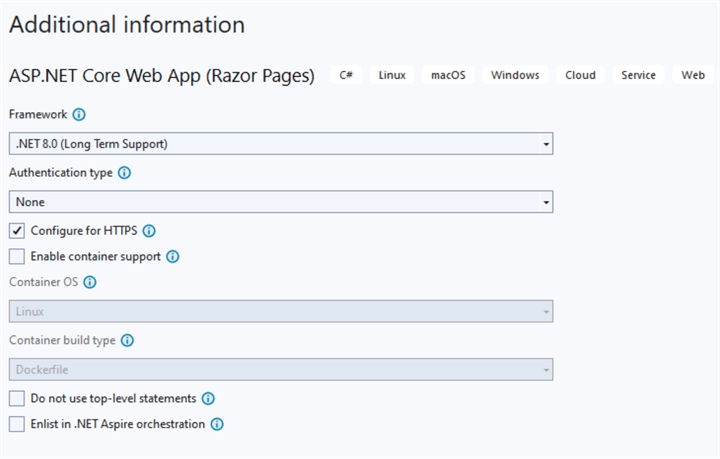
Click Next and choose the framework version for your application. Then, click Create.

If you run the application, you will be redirected to the Welcome page in your browser.
Modifying the Index Page
In Visual Studio, go to the Index.cshtml page and modify its content to:
@page
@model IndexModel
@{
   ViewData["Title"] = "Home page";
}

@if (ViewData["Error"] != null)
{
   <div class="alert alert-danger">@ViewData["Error"]</div>
}

<body>
   <form id="reportForm" method="post" style="display:flex">
      <div class="form-group">
         <label for="MedTestSolicItem">MedTestSolicItem:</label>
         <input type="number" id="MedTestSolicItem" name="MedTestSolicItem" class="form-control" required min="1" oninput="validatePositiveNumber(this)" />
      </div>

      <div style="margin: 20px;">
         <button type="submit" asp-page-handler="RenderReport" class="btn btn-primary">Render Report</button>
         <button type="submit" asp-page-handler="ClearReport" class="btn btn-secondary" formnovalidate>Clear Report</button>
      </div>
   </form>


   @if (!string.IsNullOrEmpty(Model.PdfReport))
   {
      <div class="text-center">
         <div class="container">
            <h1>Report Viewer</h1>
            <iframe src="data:application/pdf;base64,@Model.PdfReport" type="application/pdf" style="width:100%; height:600px;"></iframe>
         </div>
      </div>
   }
</body>

@section Scripts {
   <script src="~/lib/jquery/dist/jquery.min.js"></script>
   <script>
      Function validatePositiveNumber(input) {
         if (input.value < 1) {
            input.value = '';
            alert('Please enter a positive number.');
         }
      }
   </script>
}
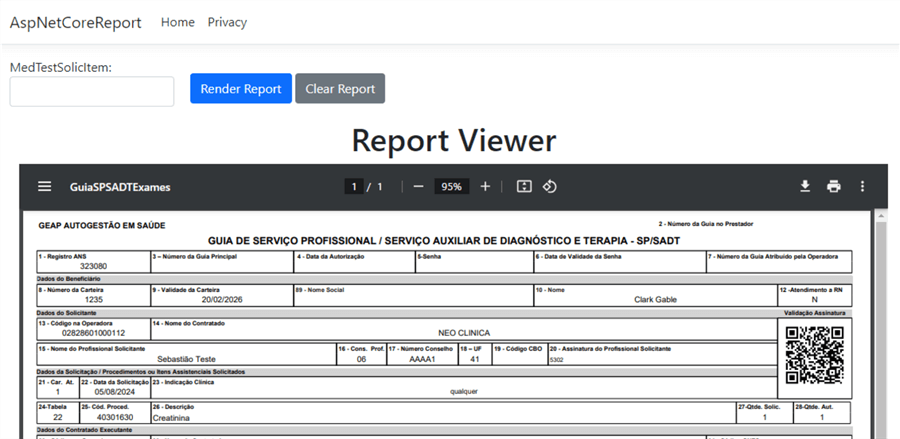
I added an input box to load the Test Id that I want to view, a button to load the Report, another one to Clean Up the page, and a Frame for the pdf.
Modifying the Razor Page Model
I will use the previous URI at the FetchReportAsync changing all the contents of the Index.cshtml.cs page to:
Using Microsoft.AspNetCore.Mvc;
Using Microsoft.AspNetCore.Mvc.RazorPages;

Using System.Net;

Namespace AspNetCoreReport.Pages
{
   public class IndexModel(IConfiguration configuration) : PageModel
   {
      private readonly IConfiguration configuration = configuration;
      public string? PdfReport = "";
      public int MedTestSolicItem = 0;

      public async Task<IActionResult> OnPostRenderReportAsync(int medTestSolicItem)
      {
         try
         {
            PdfReport = Convert.ToBase64String(await FetchReportAsync(medTestSolicItem));
            return Page();
         }
         catch (Exception ex)
         {
            ViewData["Error"] = "An error occurred while rendering the report: " + ex.Message;
            return Page();
         }
      }

      public IActionResult OnPostClearReport()
      {
         PdfReport = "";
         return Page();
      }

      public async Task<byte[]> FetchReportAsync(int medTestSolicItem)
      {
         string url = $"https://localhost:4435/ReportServer/Pages/ReportViewer.aspx?/BitMedical/GuiaSPSADTExames&MedTestSolicItem={medTestSolicItem}&rs:Format=pdf";
         string? Username = configuration["Credentials:Username"];
         string? Password = configuration["Credentials:Password"];

         HttpClientHandler handler = new()
         {
            Credentials = new NetworkCredential(username, password)
         };

         HttpClient client = new(handler);

         using HttpResponseMessage response = await client.GetAsync(url);

         if (response.IsSuccessStatusCode)
         {
            return await response.Content.ReadAsByteArrayAsync();
         }
         else
         {
            throw new Exception("Failed to render report with the status code: " + response.StatusCode);
         }
      }
   }
 }
There are other options to store the credentials to access the Report Server API. However, I will add it in the appsettings.json file, keeping the rest as it is:
{
     "Credentials": {
        "Username": "user_name",
        "Password": "password"
    },
…
}
Running the Application
Running the application in Visual Studio, type the values for the parameters of your report and click Render Report. The result is the possibility to view it in an ASP Net Core app using the Report Server API.

Next Steps
- Adapt the solution to the details of your Report Server and report forms.
- More information can be found at the Microsoft Learn website: What are REST APIs for Reporting Services?
About the author
 Sebastiao Pereira has over 38 years of healthcare experience, including software development expertise with databases.
This author pledges the content of this article is based on professional experience and not AI generated.
View all my tips
Article Last Updated: 2024-11-05


