By: Koen Verbeeck
Overview
In this section, we build further upon the data flow created in the previous section. We will add an extra column using the Derived Column transformation and fetch extra data using the Lookup component.
SSIS Derived Column Transformation
The Derived Column transformation has the ability to either modify existing columns or add new columns to the buffer. You can open the editor by double-clicking the component.
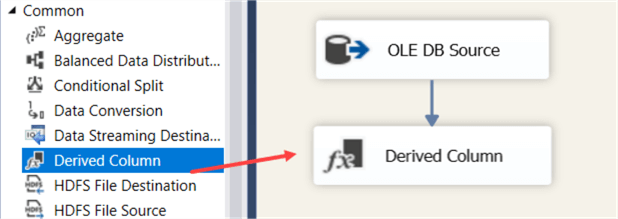
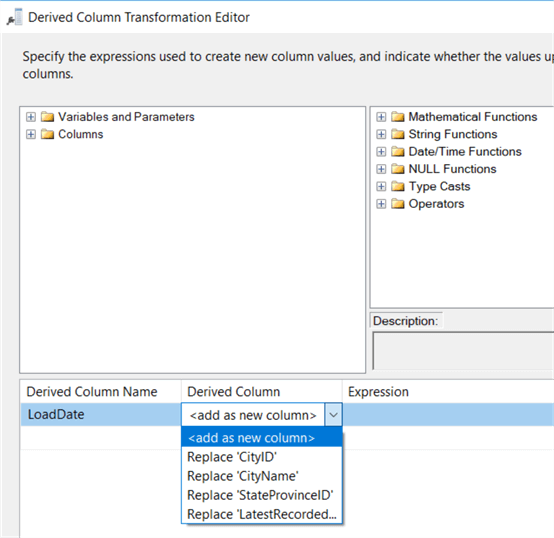
In the editor, you can drag variables, parameters and existing columns to the expression. At the right, you have also a library of functions available. You can also choose if you want to replace existing columns or if you want to add a new column:
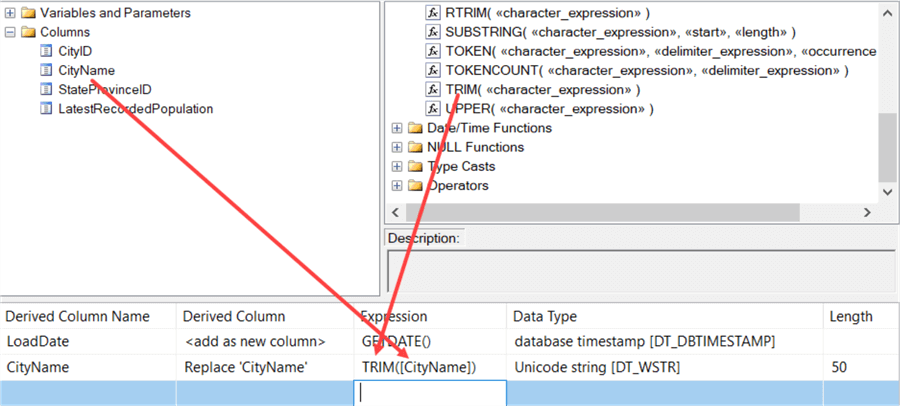
Letís add a new column that contains the date of today (using the GETDATE() function) and trim the existing CityName column. You can drag the column name and the Trim function to the editor:
The Derived Column transformation is very powerful, but the one-line expression editor can be frustrating. Letís add a multicast and a data viewer to inspect the results:

SSIS Lookup Component
With a lookup, we can match our current columns against a reference dataset and retrieve one or more columns if a match has been found. In our dataset, we have the StateProvinceID column. We are going to fetch the full name of the State/Province. Drag a Lookup transformation to the canvas and open the editor. In the first pane, there are a couple properties to set:
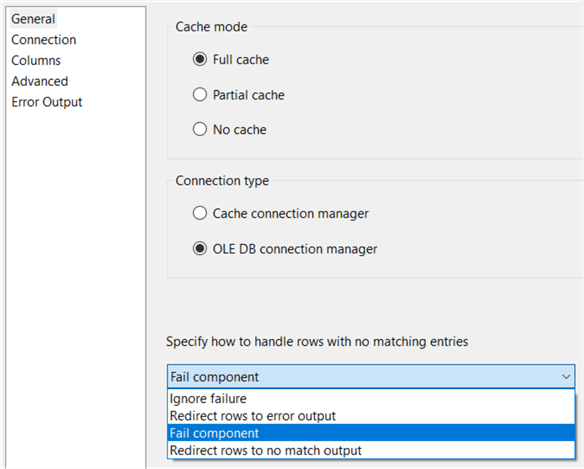
- Cache mode. This defines how the reference dataset is loaded. With full cache, the entire dataset is loaded into memory at the start of the data flow. This allows for very quick matching between the datasets. With partial cache, only a part of the dataset is loaded into memory. If thereís a cache miss, the data will be fetched from the database and put in the cache, possibly evicting older data. With no cache, nothing is loaded into memory and for every row a query needs to be sent to the database, which is quite slow.
- Connection type. You can either choose a cache connection manager for when you when to pre-load your reference datasets and use them in multiple packages or data flows, or a regular OLE DB connection manager. The default is a standard OLE DB connection manager. Notice thereís no option to use ADO.NET or ODBC.
- No match behavior. Here you specify how the lookup component
should behave if no match was found for a row.
- Ignore failure. The row is passed to the Match Output and the columns from the reference dataset get NULL values.
- Redirect rows to error output. All rows without a match are sent to the error output (the red arrow).
- Fail Component. The default, but a bit drastic. The data flow and package will stop if no match is found.
- Redirect row to no match output. A new output is created where all rows without a match are sent to.
Letís set this option to ďRedirect row to no match outputĒ. In the next tab, you need to define the reference dataset. You can use the dropdown box to select a table, but just as with the source, a SQL statement is preferred. Select only the columns you need to make the match and of course the columns you want to return. We can use this T-SQL statement:
SELECT
[StateProvinceID]
,[StateProvinceName]
FROM [Application].[StateProvinces];
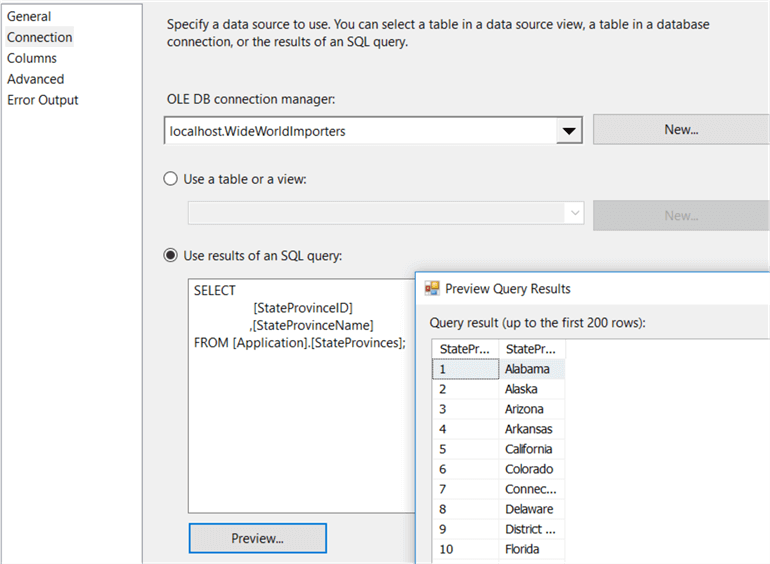
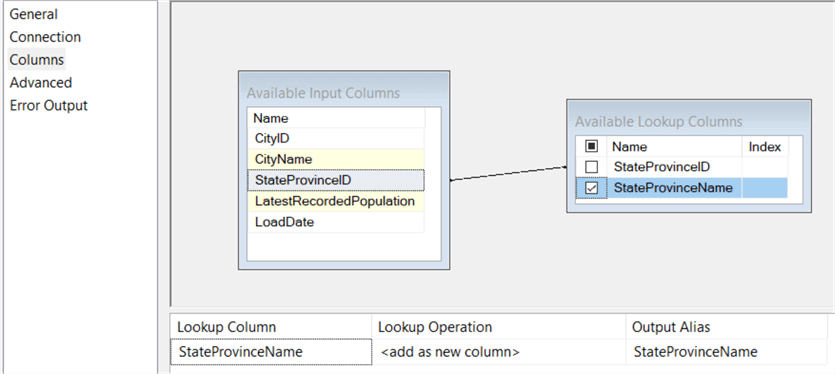
The last tab we need to edit is the Columns tab, where we specify how the matching will take place and which columns we want to return. You need to drag the key columns from the input columns to the key columns from the lookup columns. Then you can check each column from the lookup columns which you want returned; in our case the StateProvinceName.
Close the editor. When we now attach a multicast to the lookup component, we can choose which output we want:
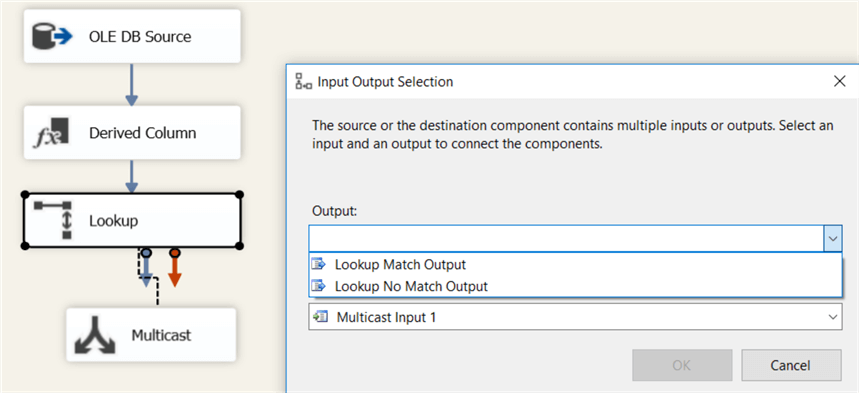
Letís attach multicasts on both outputs, combined with data viewers so we can test the lookup component:

As you can see, the StateProvinceName column has been added to the buffer and there were no rows sent to the no match output.
Last Update: 8/31/2017
