By: Scott Murray
Overview
Parameters in SQL Server Reporting Services (SSRS) add a level of interactivity to reports. Parameters are able to be utilized for everything from criteria in a query to filters for a Tablix to controlling visibility of objects on a report. Furthermore, they can be populated from a set of constant values or a they can be based off the results of a data set query. Parameters are the main component of any interactive reporting tool.
Parameters
This tutorial will review not only setting up a parameter, but also show its use in several contexts.
Creating a Parameter
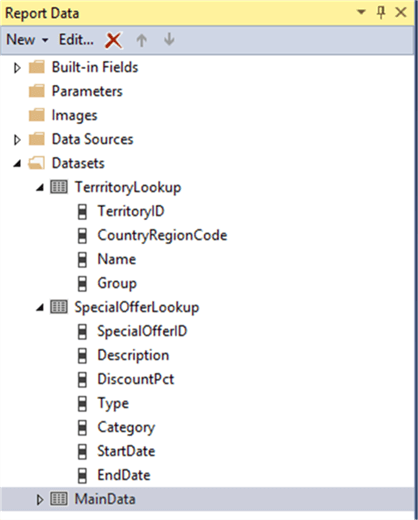
Leading off the process, we will assume that Visual Studio—SSDT-BI is being used and has been opened to a new report, and that the data source(s) have been created. Next, to facilitate the setup of the parameters, several datasets will need to be created. In the below example, one dataset is the Territory Lookup and the second is the SpecialOfferLookup. These datasets will be used to populate the parameter, as we will see shortly.
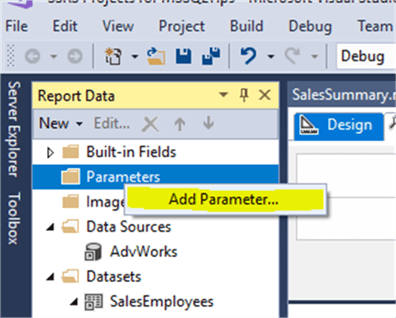
To create a new parameter, right mouse click on the Parameter folder and select Add Parameter.
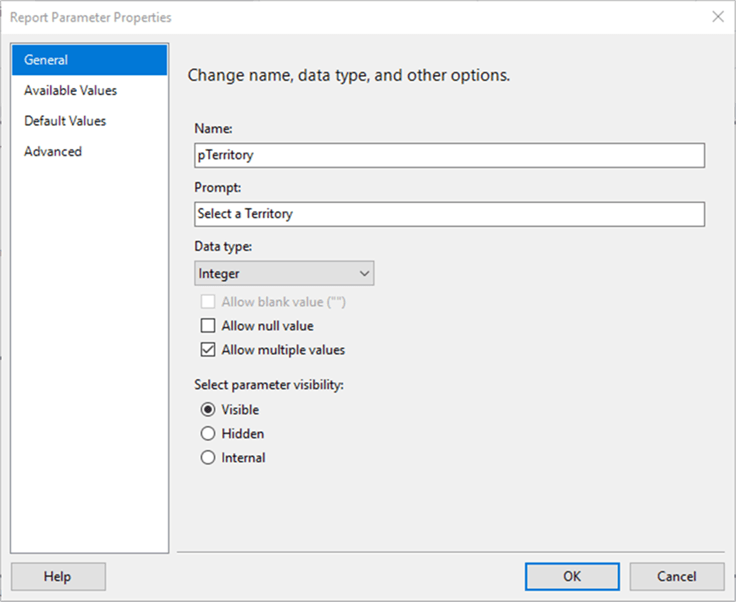
On the new report parameter screen, after naming the parameter, the next steps include:
- Deciding what prompt wording should be presented to user running the report.
- Defining the data type; note this is the data type of the value not the parameter label. Also, this data type also determines the type of parameter that will be presented to the report consumer. For instance, if Date/Time is selected, a calendar type selector will be presented.
- Allowing blank values.
- Allowing null values.
- Allowing multiple value – allowing null values produces a few complexities that we will cover later.
- Visibility
- Visible – of course this means the parameter is visible to all users1
- Hidden – parameter is not presented to end users when running the report, but the parameter can be passed into the report at run time and does show up when setting up subscriptions.
- Internal – similar to hidden except in addition to not being presented to users running the report, it cannot be passed in a run time. This would be a value that you want to set within the report, but do not want users to be able to change.
After defining the general properties for the parameter, we must next decide how to populate the parameter list. The first option is none which creates a “free form” text box for entry when the report is run. For most parameters, I personally do not like to utilize this option.
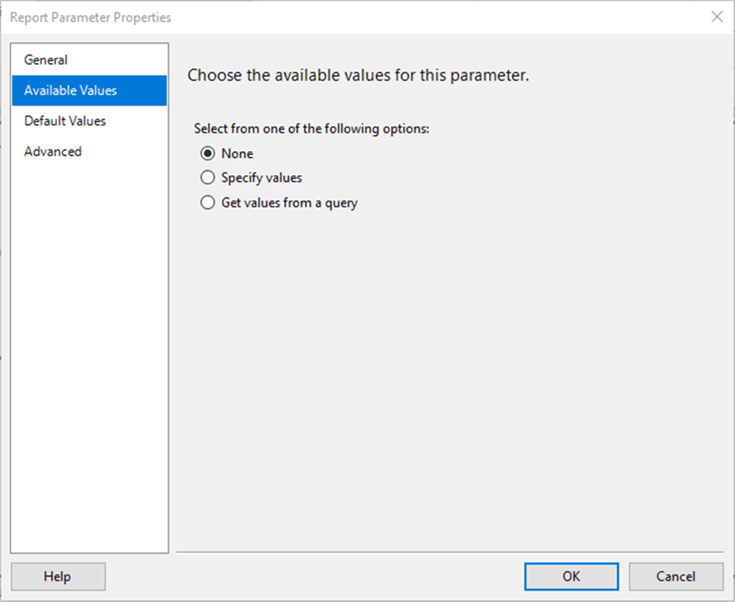
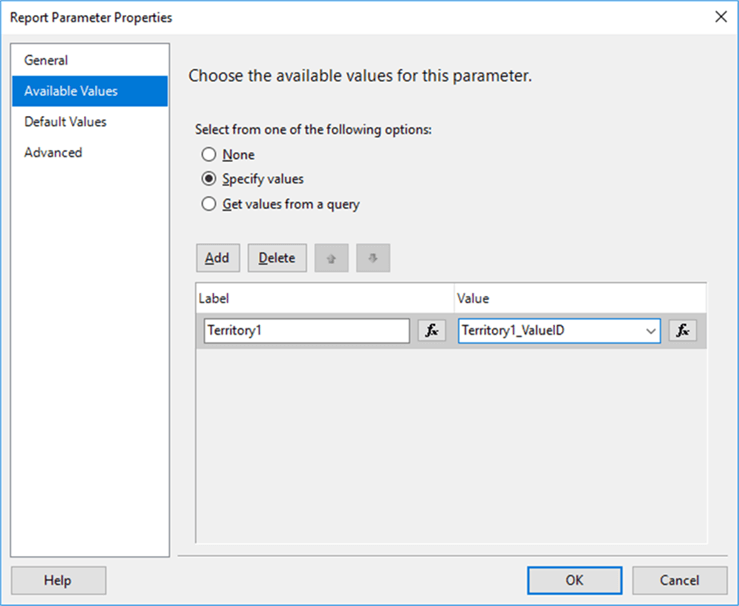
The second option allows you to manually enter the labels and related values that will be presented to the report consumer. Needless to say, this option is more beneficial than the None option, but is not entirely scalable and would require a change to the report if the values change.
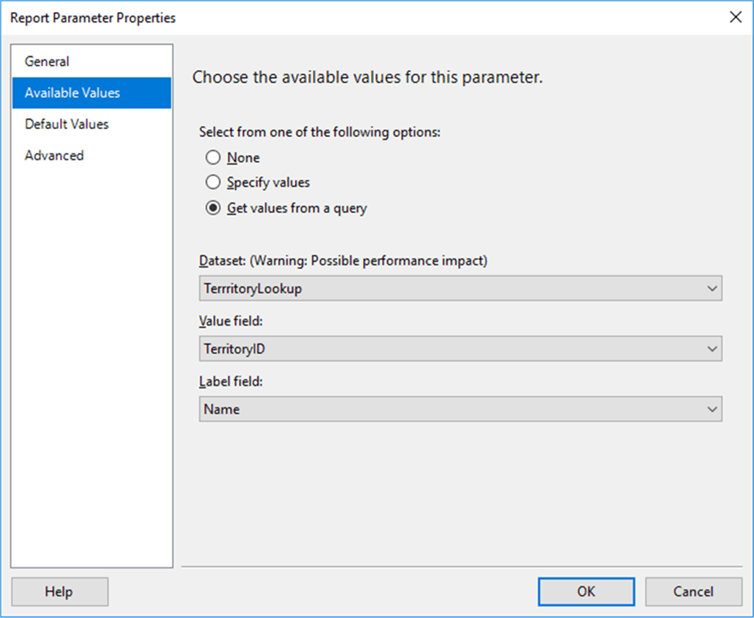
The final option is my preferred option, which allows us to populate the label and related values based on a query. In the below illustration, the TerritoryLookup dataset is used and specifically, the TerritoryID field for the values and Name for the label. The label can be the same as the value. For this parameter, a drop-down list of territory names will be presented to the report consumers.
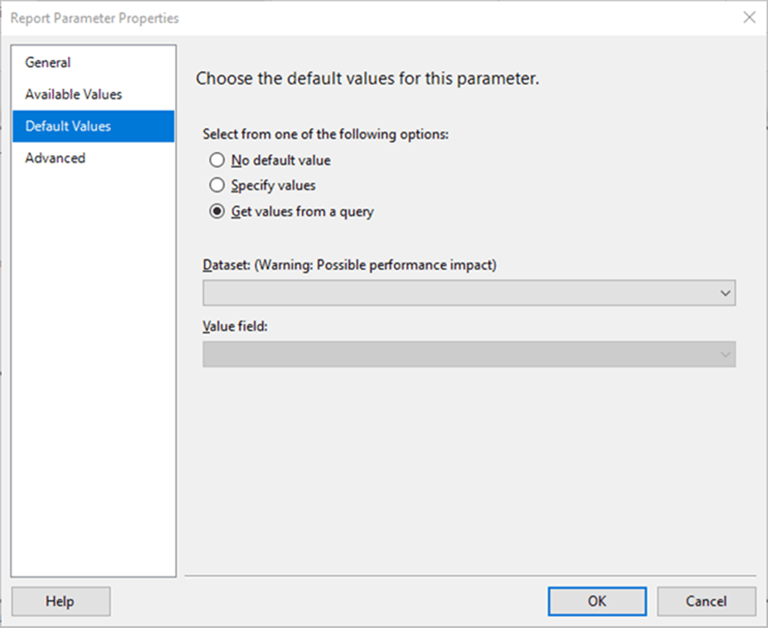
The parameter setup process continues with setting the default value(s) for the parameter. The 3 option screens look and act just about the same as the available values option except only a value is specified and not a label. Additionally, the same data set query can be used, although that may result in undesirable results. What will occur if the same data set query is selected for the default value, then ALL possible values will be selected “by default” for that parameter. In some instances that situation is actually the desired result which shows all data by default, but also gives the user the options to change the parameter later in the process. Also note that if all the parameters in a report have a default value, then the report will automatically run when it is clicked on.
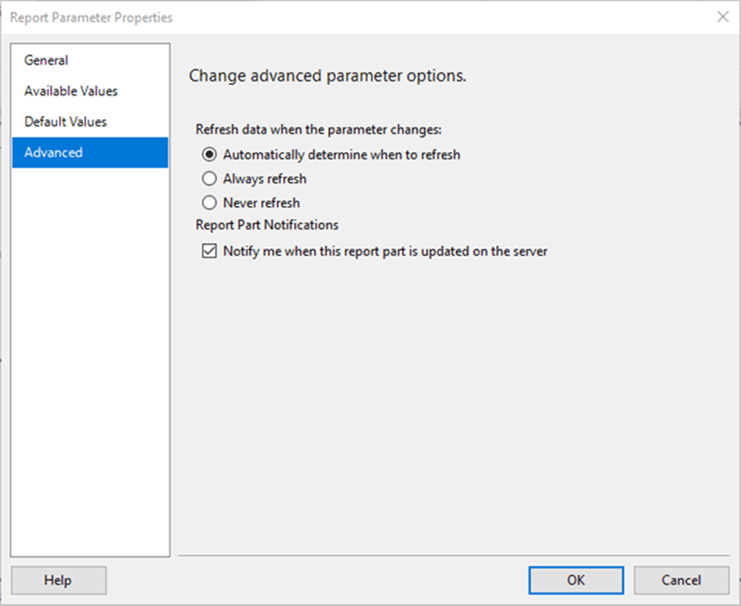
The final step in the parameter creation process is the advanced options window. The refresh option is very important if you are using dynamic dependent parameters (see additional information section for MSSQLTips on this advanced topic). Generally, you would leave this option set to “Automatically determine when the to refresh” unless you always want the parameter data set to refresh or never refresh. The second option creates a notification if this report is part of a report part and is subsequently updated by another deployment to the server.
Using Parameters
Up to this point in the tip, a pTerritory parameter was created; additionally, I created a second parameter called pSpecialOffers based on the SpecialOffersLookup query but I did not set a default value. A third parameter called pShowHide with manually entered values of Show and Hide were used and the default value was set to Show.
To use a parameter in a query, we need to specify the parameter within a data set query. You do not have to use the same name, but I prefer to do so.
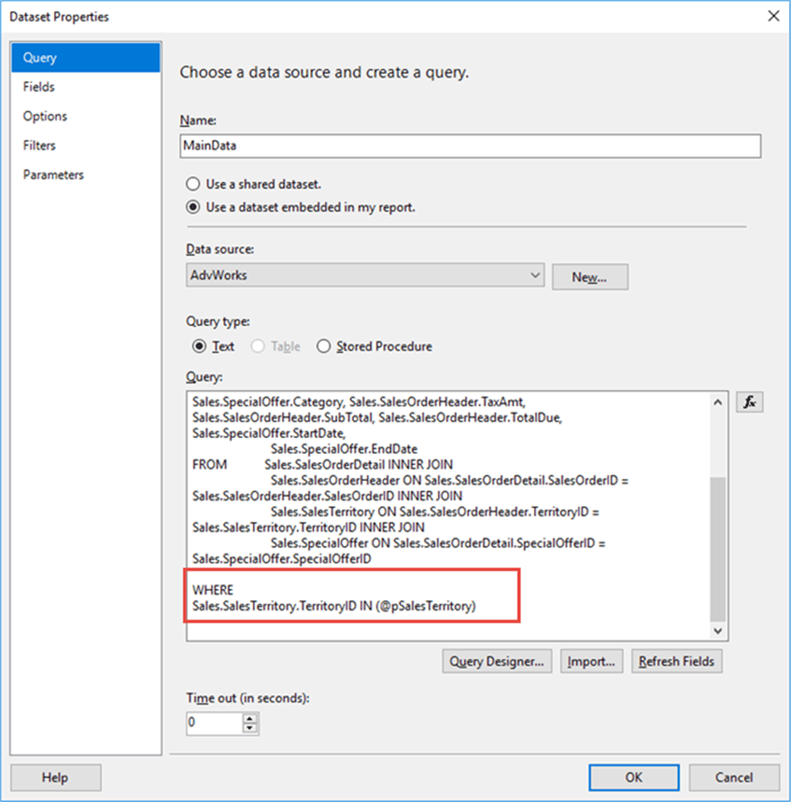
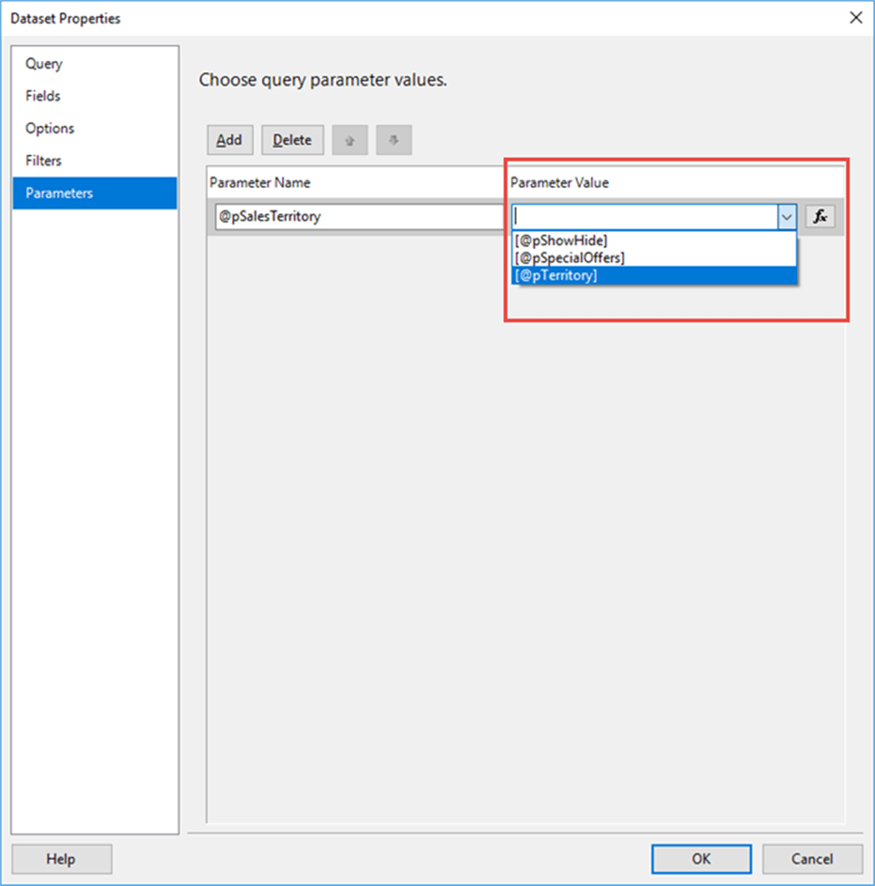
Next, we need to map the parameter used in the data set query to the parameter used in the query. As noted in the below illustration, the parameter name is parameter name used in the query whereas the parameter value is from the parameter list created for the report. Note we must be careful in the query to use the appropriate operator in the criteria. You must use IN or NOT IN if you are using a multi-value parameter (this example uses a multi-value parameter). Also, you should note that if multi-value parameters are used and are passed to a data set using a stored procedure as the source for the query, you will need to “split” the comma delimited string passed as a parameter to the stored procedure.
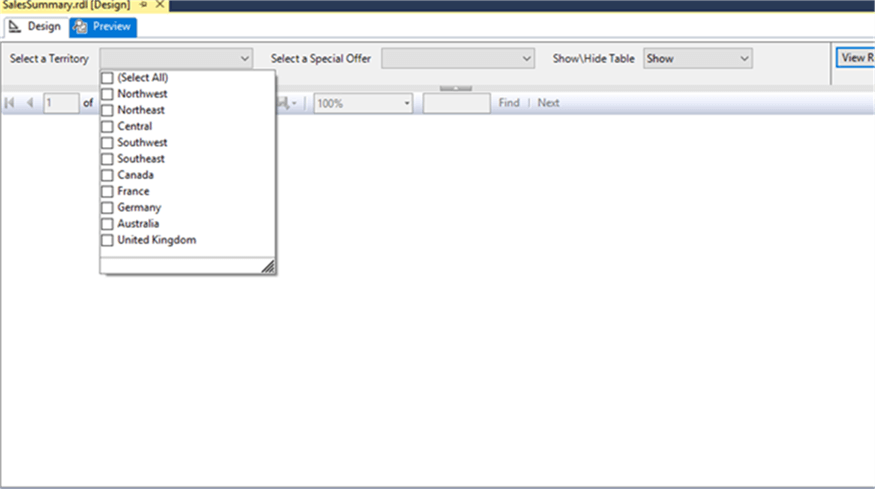
Once the parameter has been mapped in the query, we can go ahead and preview the report. As shown below, the parameter drop-down box is populated with the Territory Label list.
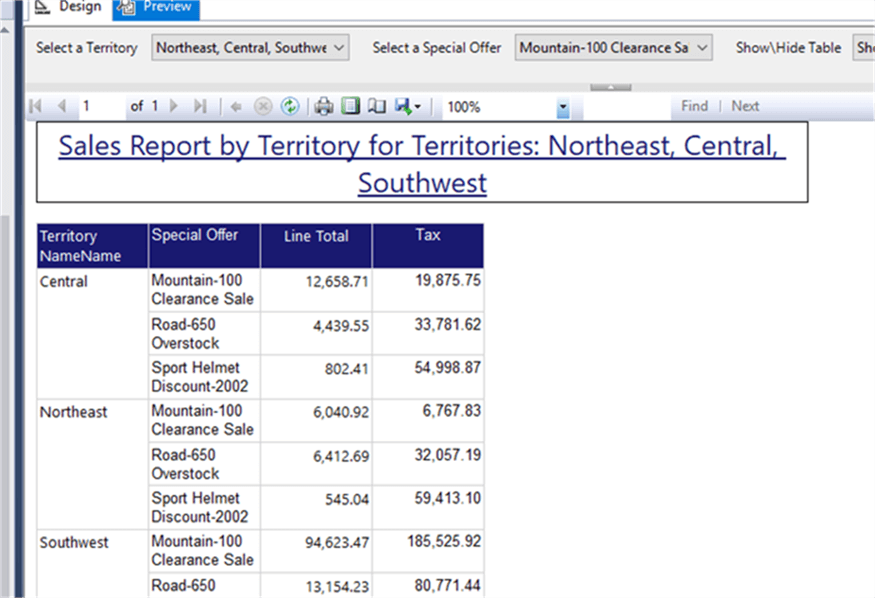
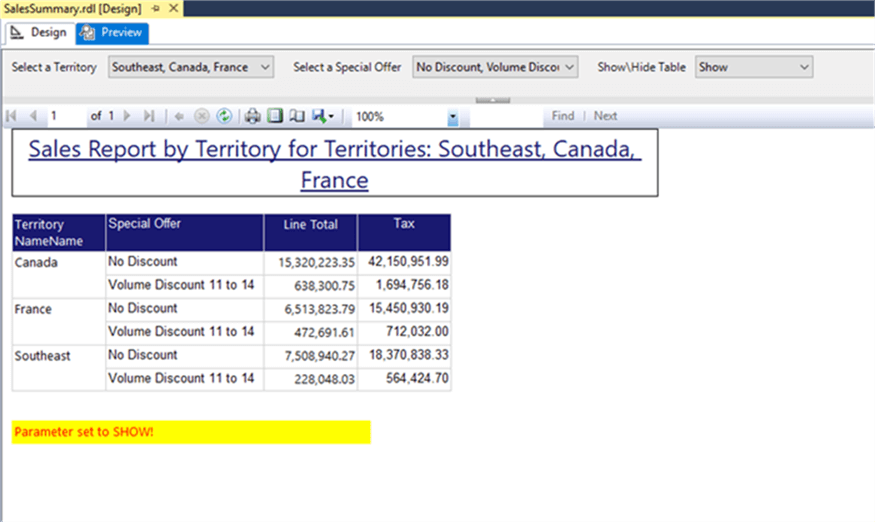
Selecting three of the territories produces the Line Total and Tax Sales report for the selected territories.
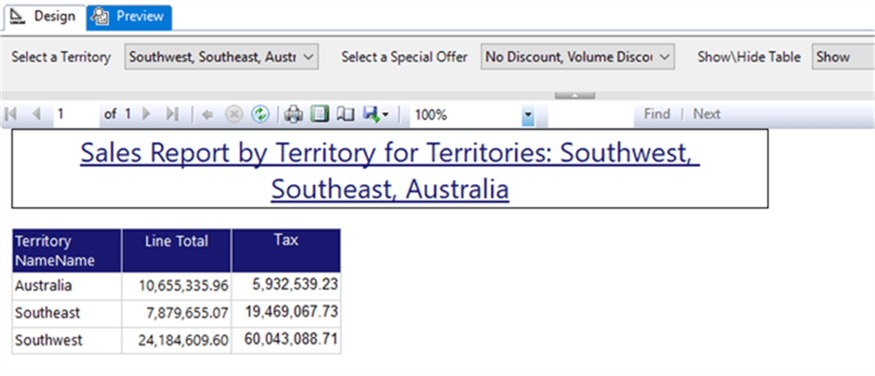
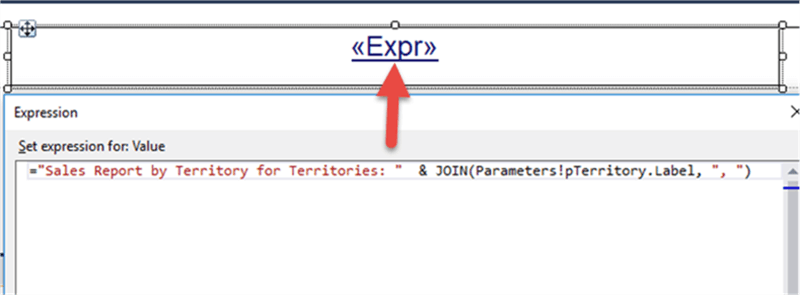
To further distinguish what territory is selected, the Report Header is set to an expression in the title text box. The expression joins the selected parameter “labels” into a comma separate list.
One alternate way of using a parameter is in a filter. As shown below, a filter is added to the report Tablix which filters SpecialOfferID based on the selected parameter value(s).

The filter works after the query returns data, so it is sometime beneficial when dealing with aggregate values or groupings where the query does the grouping and aggregation and the filter limits the actual values shown on the report.
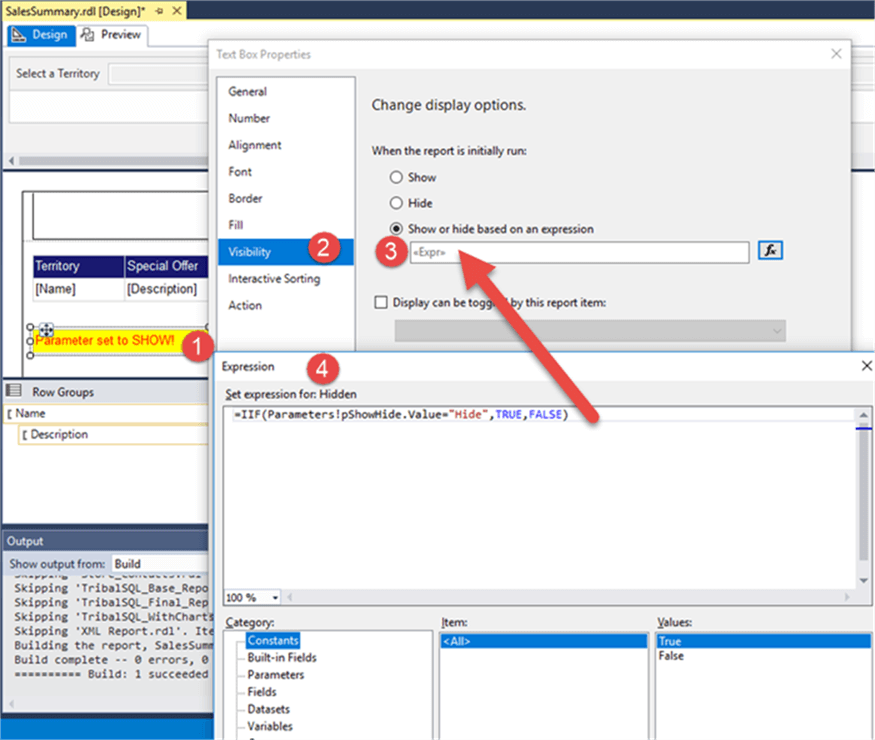
One other use of a parameter is determining the visibility of an object, such as, a textbox or tablix. In the below example, the visibility of the textbox is set based on the value selected in the parameter. If Hidden is selected, the Hidden Visibility property of the object is set to True ( True = hidden) ; to the contrary if Show is selected, the Hidden Visibility is set to False.
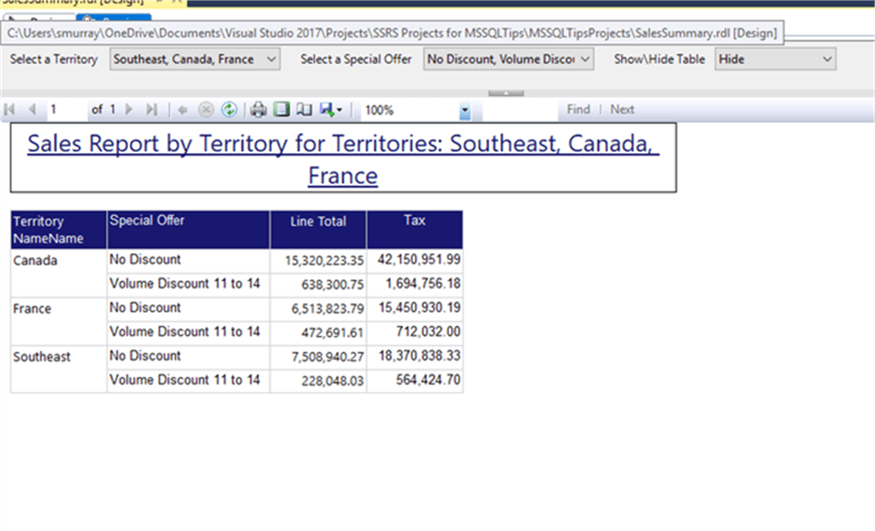
Now if the Show Hide Table is set to Hide, the text box will not show.
However, if Show is selected, then the text box will be displayed.
As you can see using parameters adds a tremendous amount of versatility, interactivity, and flexibility to your SSRS reporting infrastructure. For the next step in our tutorial series, we are going to focus on the design grid and all that it can do.
Additional Information
Last Update: 12/29/2017
