By: Scott Murray
Overview
Once a Report Server report is completely designed, the next step is post or deploy the report for all to see. After deploying a report (and likely planned beforehand), security needs to be set on the SSRS website. Additionally, there are several options on the website that need to be considered as reports are deployed.
To start off the process, we will assume that Visual Studio—SSDT-BI is being used to design a data source(s) and report(s) along with any necessary parameters. Furthermore, we will assume the report design is complete and ready for report consumers to review, and finally that some reports have been successfully deployed to the website.
SSRS Security
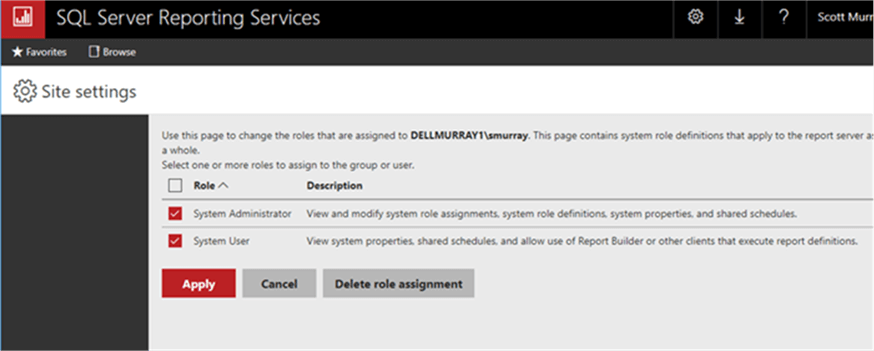
Security on the SSRS website utilizes a several layer approach. At its highest point, there are System Level Roles which allow for control of major, system wide settings.

Users assigned to the System Administrator role are the main administrator of everything on the site; members of this role have full control over the site and can modify role assignments, role definitions, various site wide properties, and create subscription schedules. The system user only has the ability to view these same properties, and role also has the ability to execute Report Builder reports. In either case, a local/Windows group or user can be added using the Add group or user option.
Moving beyond the system level roles, permissions must also be applied at the folder and report level on the Report Server. Similar to the System Assignments, a local or an active directory user or group can be assigned to one or more roles. SSRS includes 5 predefined roles that should suffice in most circumstances. These roles include:
- Browser-allows users to run reports and browse folders; this role will be used by most end users
- Content Manager-allows users to manage and define folders and reports and to grant permissions
- Report Builder-allows users to create Report Builder reports
- Publisher-allows users to deploy / upload reports and create folders
- My Reports-allows users to create and maintain personal MyReports folders
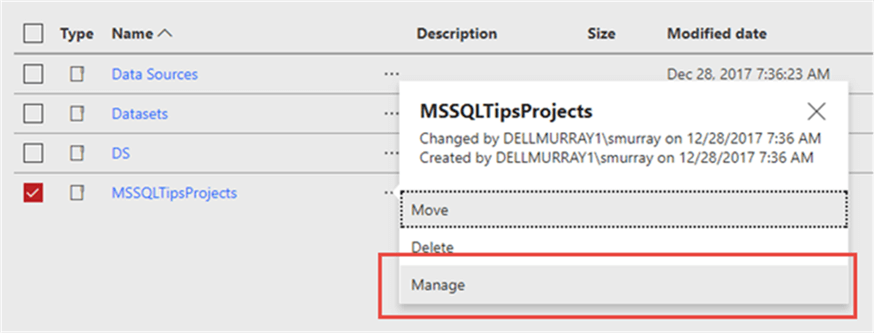
Using the MSSQLTipsProjects folder as an example, in the below illustration, we will set the permissions for the folder. Setting up permissions for a report is completed in the exact same way, except you are managing the report security and not the folder security. To begin the process, first select ellipse button ( 3 dots ) to the right of the folder and then pick Manage.
Next select the security option.
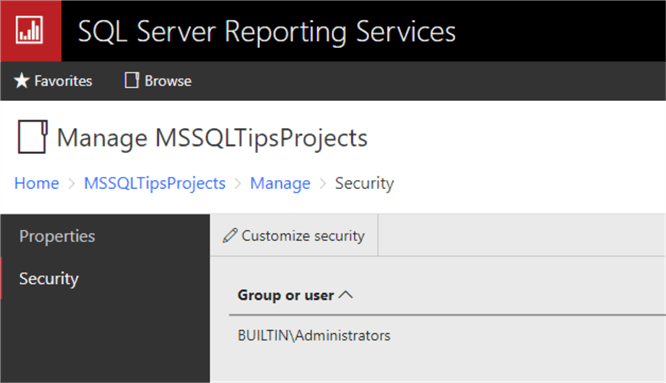
To set the security for this particular folder, the Customize security option must be selected. The following pop up warning will be displayed. Some additional attention needs to directed to how permissions are inherited by subfolders and reports. First, the role assignments use a waterfall methodology. Thus, starting at the home page, all folders, subfolders, or reports underneath the home page, in the hierarchy, will have the same permission that are assigned to the home page UNLESS the permission chain is broken, either at the folder, subfolder, or report level. Clicking on the Customize security button, as displayed above, will break the permission chain and allow for the customization of the security for that individual folder or report.

We now have the ability to add users to the permissions list for this folder (or report if we were using a report) by selecting Add group or user.
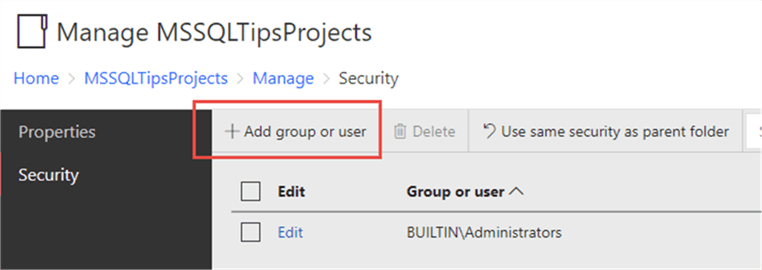
A windows group or user must be entered, and then the appropriate roles for that user or group should be selected.
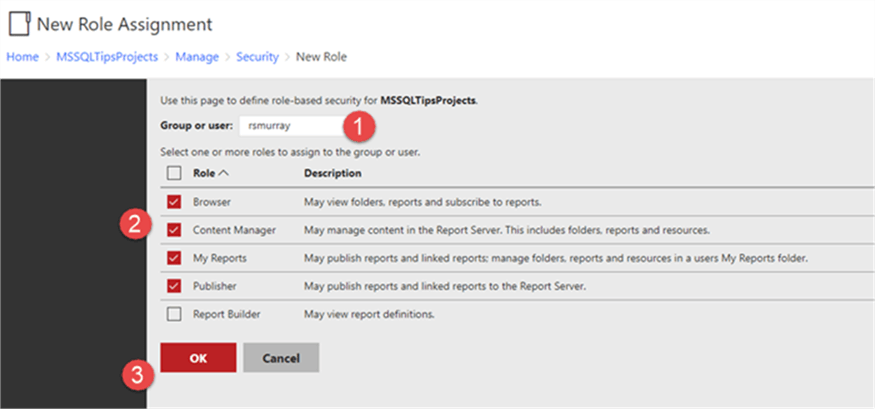
Permissions are then set for this user for the selected folder or report.

Fortunately, if at some point you would like to go back to having your folder or report inherit its permission from a parent structure, you can click on the Use same security as parent folder button.

The third layer of security is at the data source level. Specifically, for all data objects (i.e. tables, views, stored procedures) used in a particular report, the user running the report must have appropriate permissions to access the data and its related object (i.e. select permissions for tables and views and execute permissions for stored procedures). Thus, by reviewing the data source properties, we are able to set the name and password authentication that gets passed to the database when running the report. As seen in the second screen print below, the credentials being passed to the database can be:
- The user viewing the report which generally requires some additional setup (https://docs.microsoft.com/en-us/sql/reporting-services/security/configure-windows-authentication-on-the-report-server) .
- A set windows or SQL server user which is input.
- A user / password input at runtime, when prompted.
- No credentials passed at all.
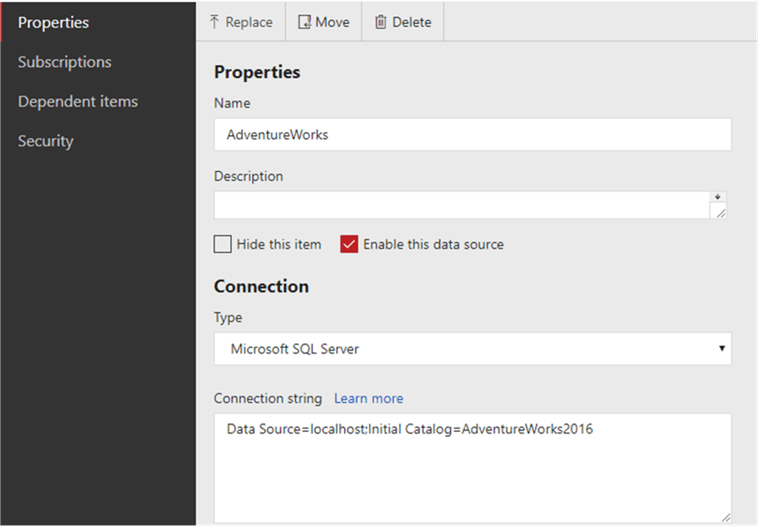
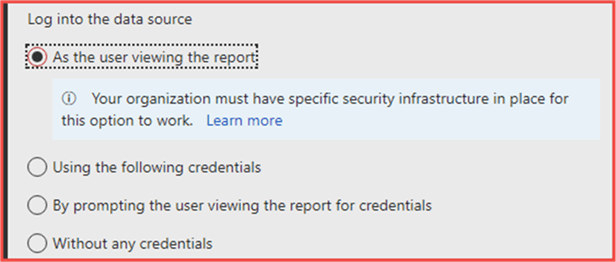
Of course, whatever option is designated, all objects involved in the dataset queries for the report must be granted appropriate permission including execute permissions on a stored procedure or select permissions for a group of tables and views.
Now that security is set, let us move on to some of the other options and properties that can be set on the website.
Manage Folders and Reports
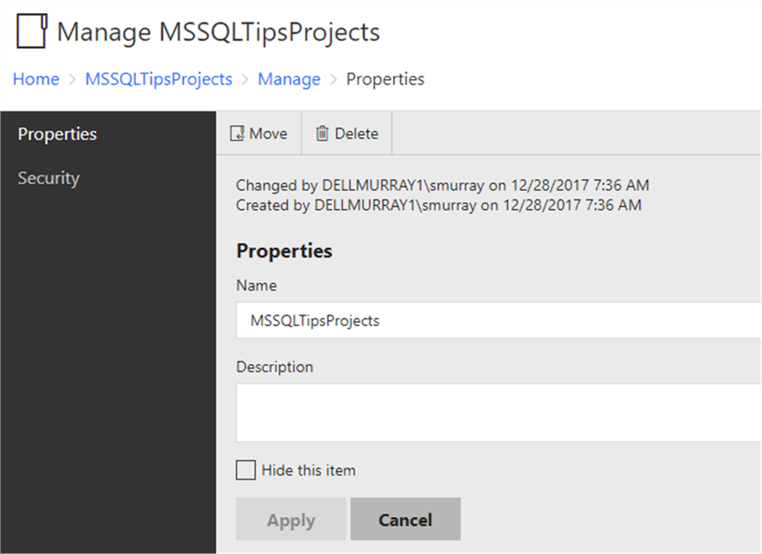
Each folder on the report server site contains the ability to move, delete, or manage.
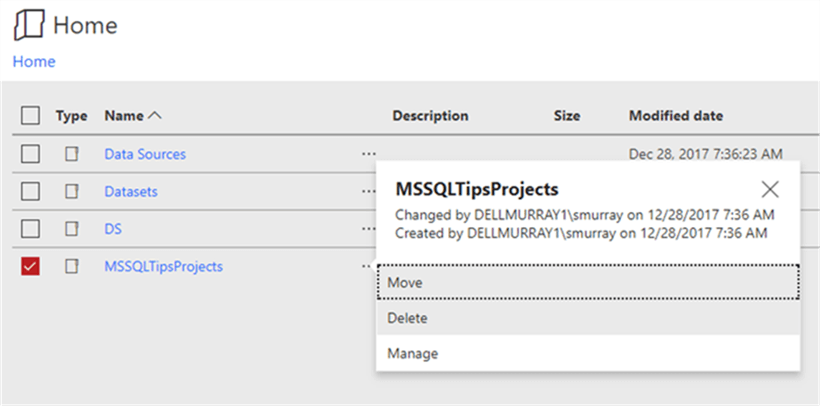
Move and delete are self-explanatory where as the manage option provides the ability to set security (which we previously discussed) along with the capability to rename, add a description, or even hide the folder from view.
Likewise, each report can also be managed in a similar way including moving and deleting the report. Moreover, the Manage option includes the ability to open (aka run) a report, edit the report in report builder (proper permission must be granted), or download the report rdl file.
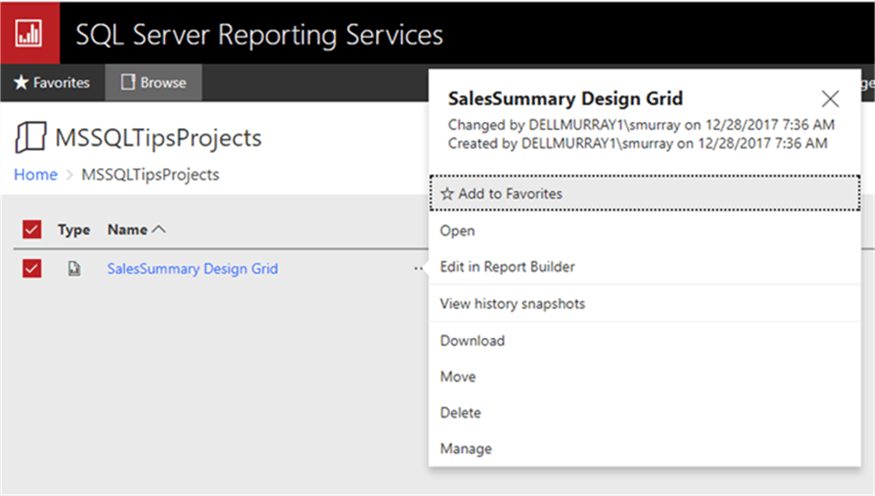
The add to favorite option is a new addition in SQL 2016.
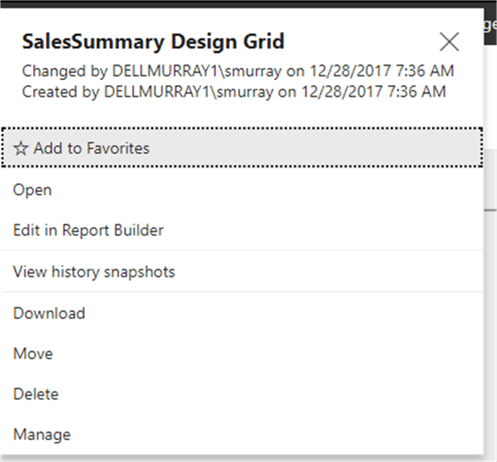
Selecting this option adds a link to the report in your favorites list.

Additionally, we can set the reports description, its visibility, and its timeout settings.
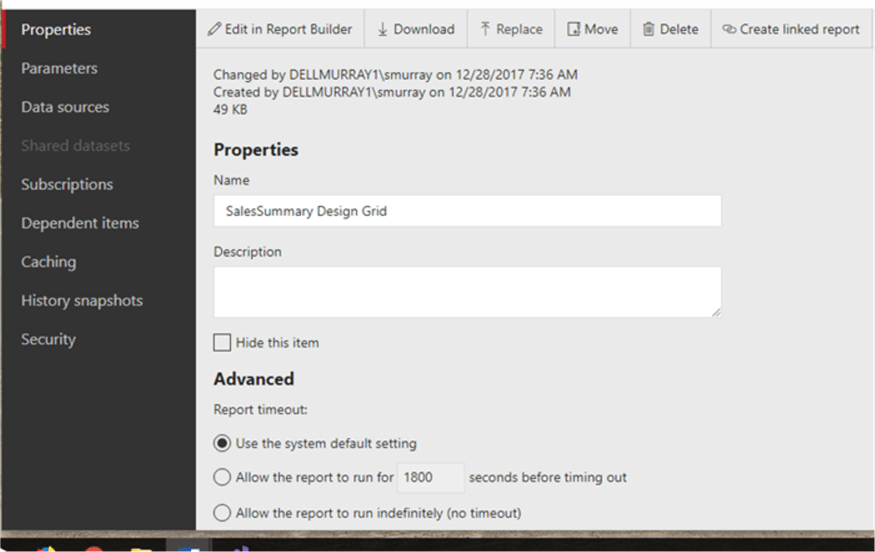
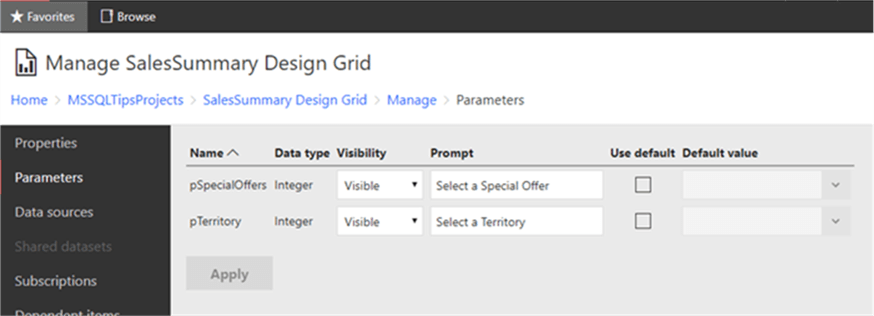
The Parameters tab allows the reports parameters to be changed including the default value. Note this option overrides any options set in SSDT-BI.
On the data source tab, the data source can be adjusted; for example, maybe a report needs a different data source for permission reasons.
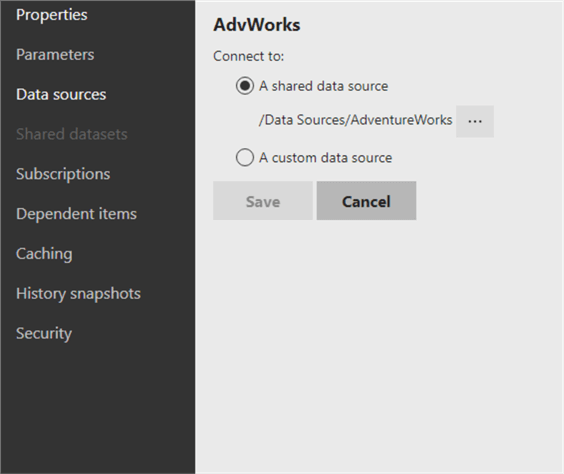
The dependent items option shows if any other reports are dependent on this report (such as a subreport), while the Caching and History snapshot options allow for setting how SSRS saves previous runs of the report.
We will discuss the subscription option next.
Subscriptions
From the SSRS website, subscriptions to a report can be added and managed. To add a subscription from the manage report window, select the subscription option.
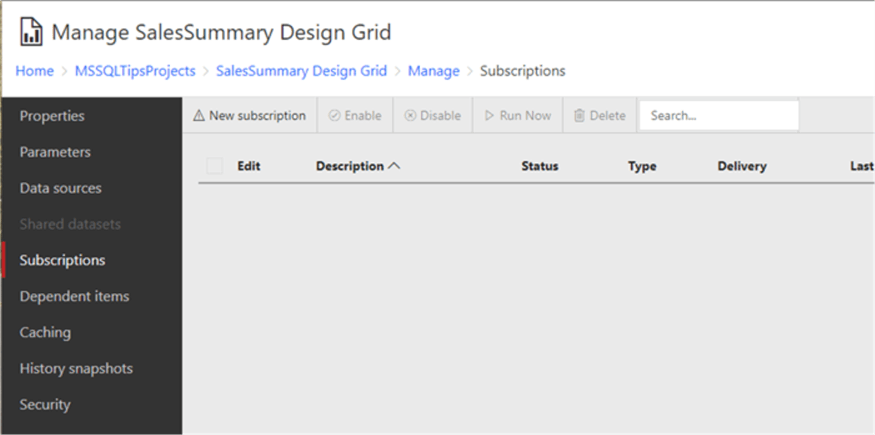
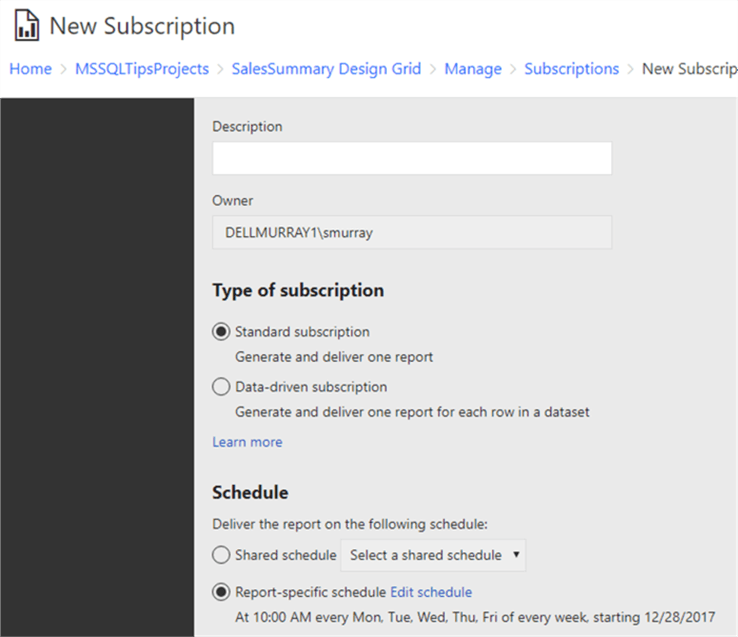
Next, we set the subscription description, the type of subscription (note data driven is enterprise edition only), the schedule, the destination (save to a file share or email), and finally the parameters to use when running the subscription. For the destination, one of many export types can be selected including Excel, Word, and PDF.
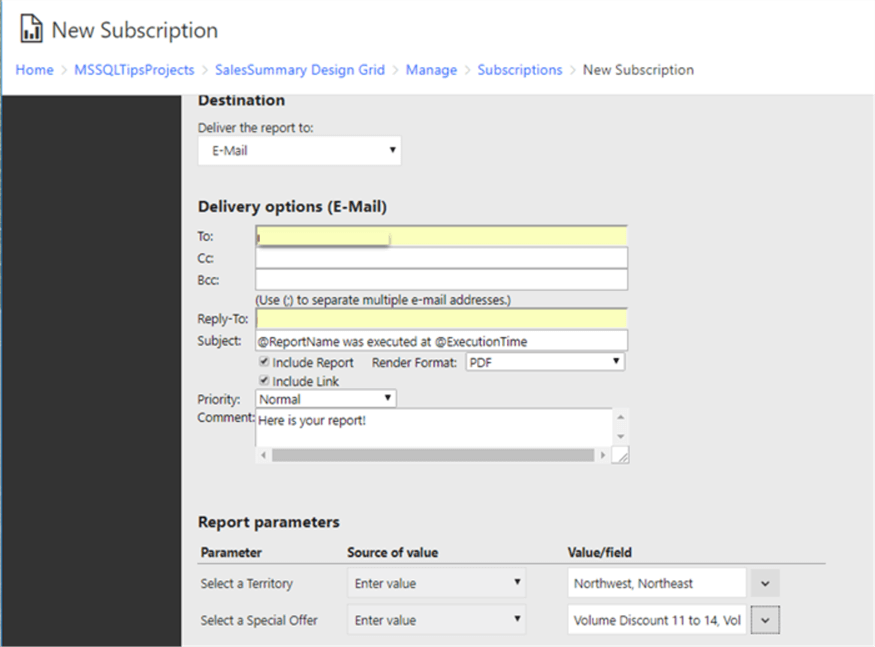
As the report subscriptions are executed, using email in the above example, the subscription status can be reviewed on the subscriptions status page. The subscription can also be disabled, deleted, or run immediately from this same screen.

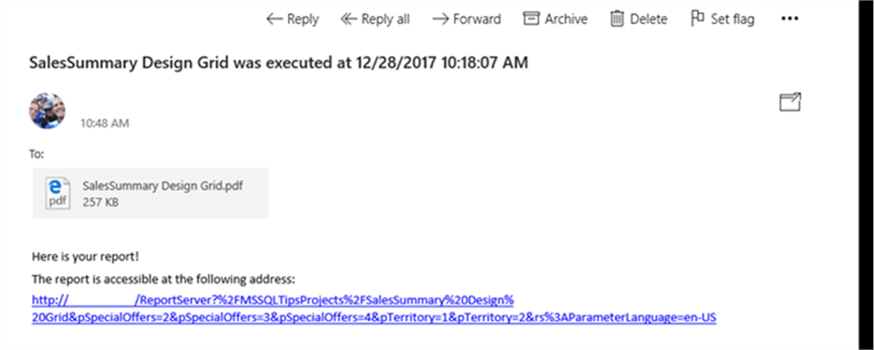
The final resulting email for the example subscription is shown below.
Search
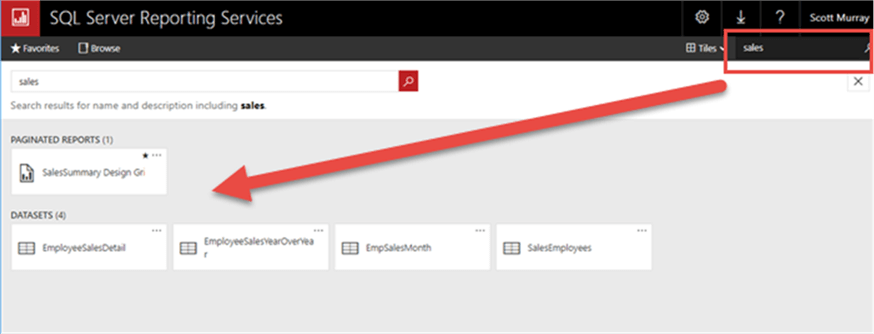
One last item that is often very helpful, but also often overlooked is the search functionality. The search process compares names and descriptions with the search term and will skip folders and reports which the user doing the search does not have access to.
Now that the report security and other options on the SSRS website are setup, we will move on to using SSMS to manage SSRS.
Additional Information
- SSRS Best Practices - https://www.mssqltips.com/sql-server-tip-category/174/reporting-services-best-practices
Last Update: 12/29/2017
