By: Koen Verbeeck
Overview
In the final chapter of this tutorial, we will finish the Biml solution for generating a staging environment. In the previous chapter, we created three files:
- One to create the environment
- One to fetch the metadata and create the tables in memory
- One to create a SSIS package that will create the destination tables
After running the SSIS package, we have a staging database with empty tables. Now we will generate all of the SSIS packages – one for each staging table – that will transfer the data from AdventureWorks to the staging database.
Generating the SSIS Packages
Assuming we already have the three Biml files mentioned in the introduction, all we need to do is create a final Biml file that will generate those SSIS packages. The link to download all of the files can be found at the end of this chapter.
The file contains the following code:
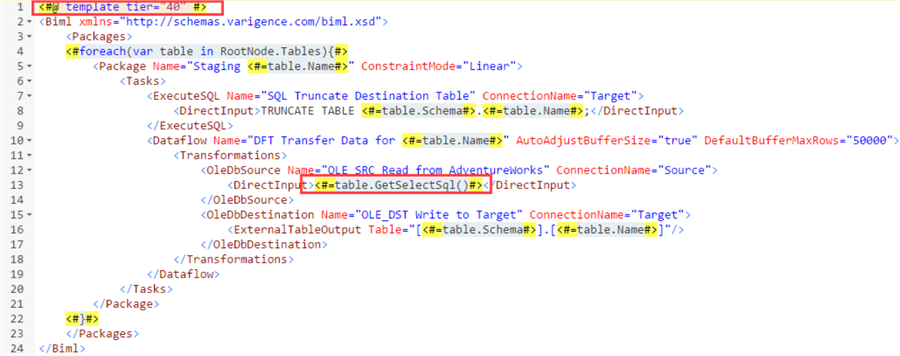
The file has tier 40. The pattern used is straight-forward:
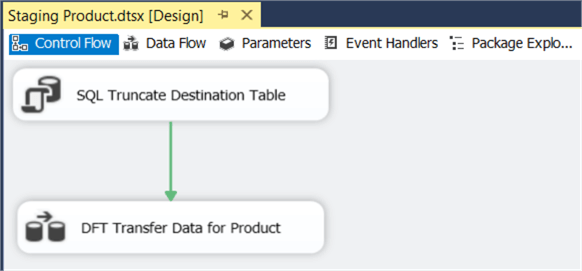
- Truncate the destination table.
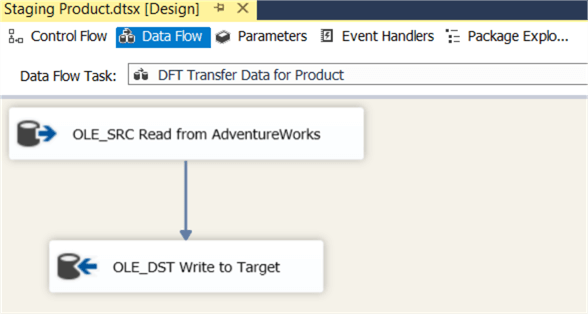
- In a data flow, read all data from the source table and write it to the staging table.
Again an extension method is used to simplify the code. The GetSelectSql method creates a SQL SELECT statement that fetches all the column from the table. The package has its ConstraintMode set to linear, which means the second task follows after the first task.
The expanded Biml looks like this:
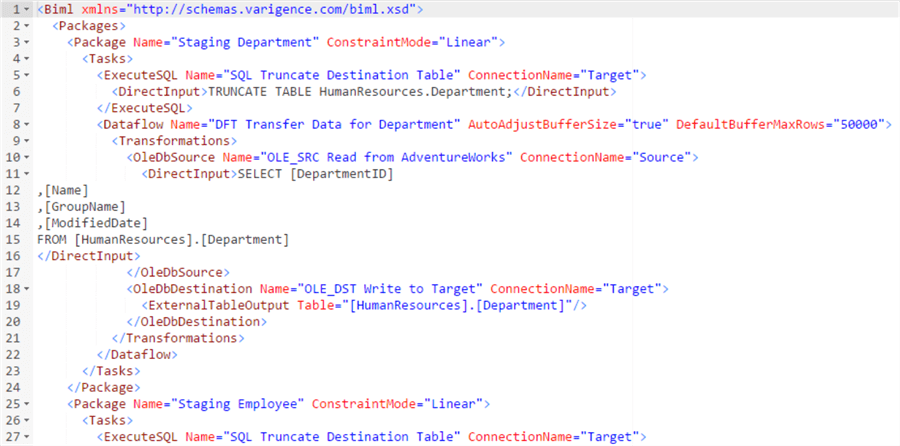
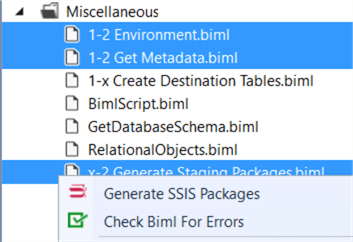
The file name is “x-2 Generating Staging Packages.biml”. The x in the name means the Biml script is not needed in the first step of the solution (creating the destination tables). To generate all the staging packages, select the environment file, the metadata file and the newly Biml file, right-click and choose Generate SSIS Packages.
During compilation, the compiler might ask if you want to overwrite the project connection manager (which was created when the package for the destination tables was generated).
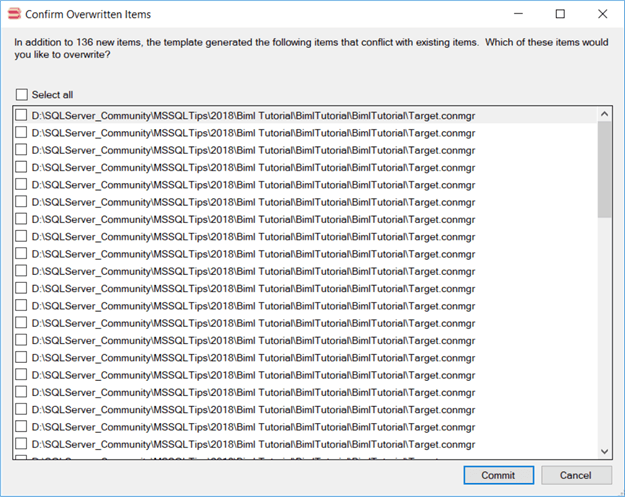
It will ask this for every generated package, since each package tries to create the project connection manager. Since it already exists, click on Select all at the top and click it again to remove all selections.
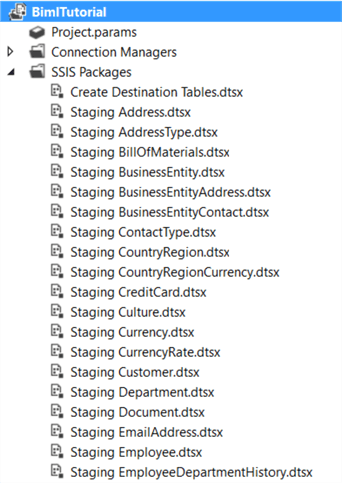
When the Biml has compiled all the packages – which can take some time – they are all added to the project.
The control flow of a package looks like this:
The data flow:
Conclusion
We have come to the end of the tutorial. It’s clear Biml can help generate many packages following the same pattern in an instant. Using Biml will clear tedious manual work from your schedule, so you can focus on the harder challenges of your data project.
Additional Information
- You can download the four Biml files used in this chapter here.
- Some Biml tips:
- Introduction to Business Intelligence Markup Language (BIML) for SSIS
- Using BIML to Generate an SSIS Import Package This tip shows how you can import a flat file using Biml.
- Generate multiple SSIS packages using BIML and metadata
- Metadata Driven SQL Server Integration Services ETL Development Using BIML
- Using BimlScript to Increase SQL Server Integration Services (SSIS) Productivity
- Metadata Driven SQL Server Integration Services Data Flow Transformations Using BIML
- Some resources:
- Cathrine Wilhelmsen, a good blog about Biml
- BimlScript, a website with walkthrough, tutorials and code snippets.
- The official documentation.
Last Update: 2/8/2018
