By: Hristo Hristov | Updated: 2021-09-02 | Comments | Related: > Power Apps
Problem
Power Apps offers a powerful and handy framework for creating apps for mobile devices (canvas apps). As it is aimed at citizen developers, the platform offers a built-in versioning system to implement source control. This built-in versioning is basic and allows tracking versions once changes to the app have been saved and published. This approach is good for simple apps but does not scale and offers little flexibility. On the other hand, and at the other end of the spectrum, Power Apps also offers full ALM (Application Lifecycle Management) by way of integrating with Azure DevOps. This is perfect but, in some scenarios, it may be an overkill.
Solution
Between simple ALM (built-in versioning) and enterprise ALM (full Azure DevOps integration) we can consider working with the source file of a Power App, editing it if needed and using it as an artefact in your versioning system. This tip shows you how to do so.
Setup
First, we must ensure we can edit an exported canvas app. Go to the Microsoft Power Platform CLI (command-line interface) homepage. Then scroll down and find the MS PP CLI standalone installer. Use the downloaded file to install the CLI. It should automatically add an environment variable so you should be able to use the Power Apps – specific commands from a regular command prompt already.
Step by step guide
Now that we have the PP CLI installed, we can "dissect" a canvas app. You can follow these steps for any canvas app in any environment, if you are at least an owner of the app. If you are just a user, you will not be able to export the package.
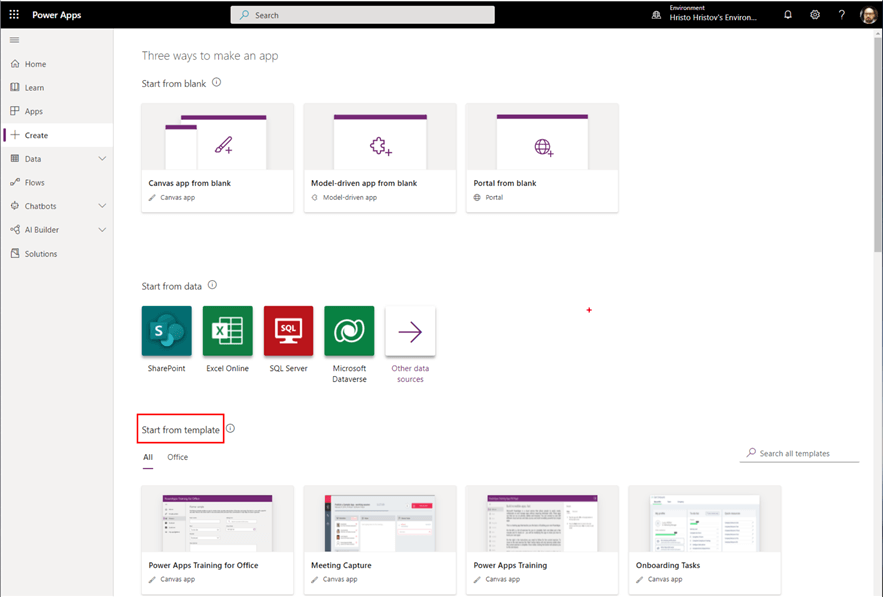
- Start by picking an app. If your app list is empty, you can use a Microsoft template.
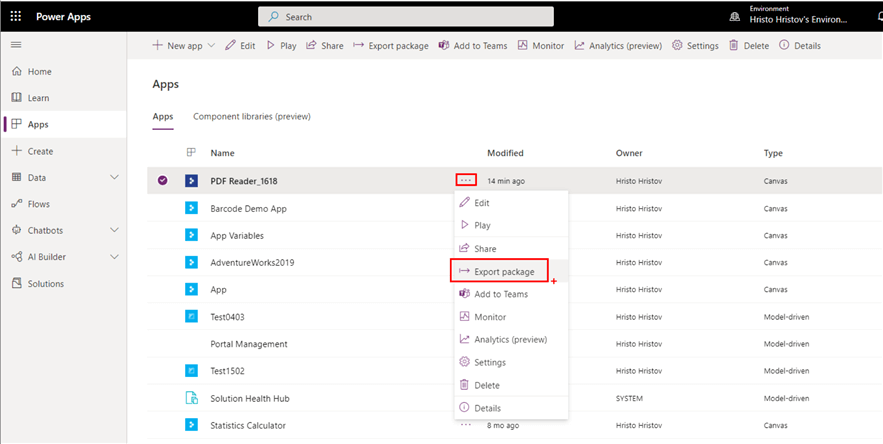
- When you have an app you want to work on, go to Export package:
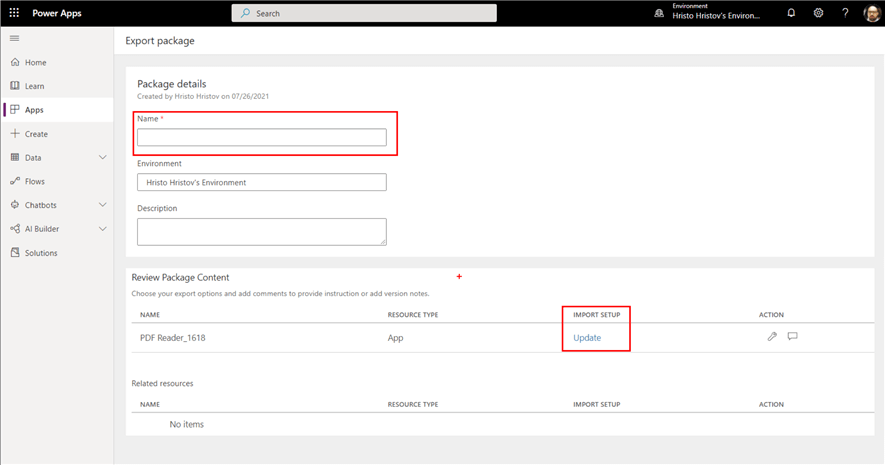
- Give your package an appropriate name. You should leave the import setup as-is (Update). This setting ensures the old existing version will be overwritten and a new version will be created once we import the package back.
- Click export and wait for the job to complete. Once ready, you will get a .zip package in your Downloads folder.
- Browse the package. You will see the manifest.json file and a folder. Open the folder and continue opening all nested folders until you see a list of files and no subfolders. The file we are after is the one with the .msappextension. The rest are metadata files we are not interested in:
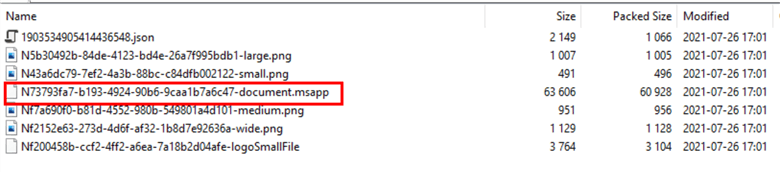
Note: Alternatively you can export directly the .msapp file by going to File > Save As from Studio in Edit mode. That is handy but if you want to import the app back, then you do need the initial zip package:

- Unzip the package and note the directory. We can not work with the .msapp file directly because it is a binary file. We must unpack it.
- Open a command prompt. Use the commandlet
pac canvas unpack --msapp FromApp.msapp --sources ToSourceFolder.SubstituteFromApp.msappwith the full path of where your target .msapp file is. SubstituteToSourceFolderwith a desired output folder. After a second or so you will have a full folder containing the following files:
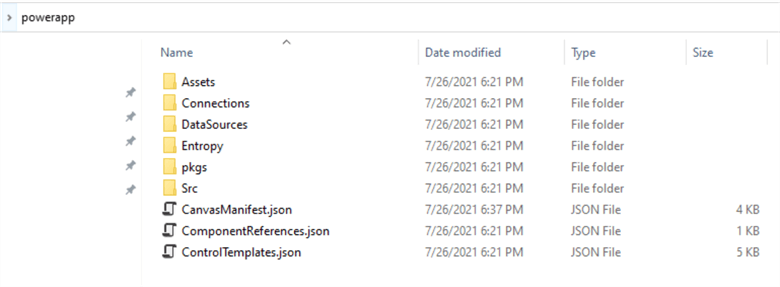
What is inside
- Assets - media files embedded in the app, e.g. imported images such as logos, etc.
- Connections - connection instances saved with this app and used when reloading into the Studio. This file lists all connections. Sensitive information is trimmed out.
- DataSources - all data sources used by the app.
- Entropy
- Contains a checksum file and other references.
- pkgs -
A downloaded copy of external references, such as templates, API Definition
files, and component files.
- TableDefinitions: will be present if external connections are configured (e.g. SQL). Contains metadata about the datasets.
- src - the
control and component files. This contains all the sources you may wish to edit
manually.
- There should be a *.yaml file for each screen you have in the app. This is where you can edit all your formulas. This is very handy if you want to examine all your formulas without scrolling through all menus in Studio. You can also copy these *.yaml files and just reuse them in another app.
- CanvasManifest.json - a manifest file. This contains what is normally in the header, properties, and publishInfo.
- Themes.json – you can use it manually edit the app’s theme by changing various color properties.
- EditorState – cached information for Studio to use.
You can edit these files with a suitable text editor (e.g. VS Code) thus bypassing the Power Apps Studio. Needles to say, caution must be exercised, and you must be very familiar with your canvas app to prevent errors during import or later when you publish those changes. A point to look out for is creating controls with identical names, e.g. two different Gallery1 controls. Once you are done examining your app, you can proceed.
- You must pack everything back to an .msapp binary file. Use the commandlet
pac canvas pack --msapp ToApp.msapp --sources FromSourceFolder. - Take the output .msapp file and go back to the directory where you unzipped the exported package. Overwrite the .msapp file there with one you just packed.
- Zip up the unzipped folder. Easiest way to do so is via the Send To option:
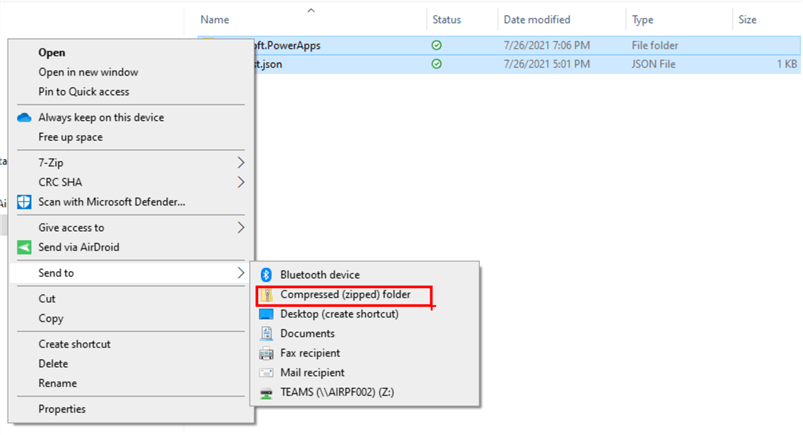
The resulting zip file can be directly imported back into Power Apps.
- Go to Apps > Import canvas app:
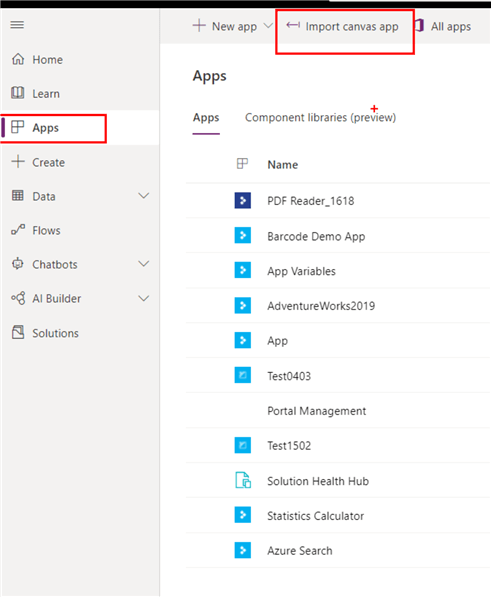
- Browse for the package and upload it.
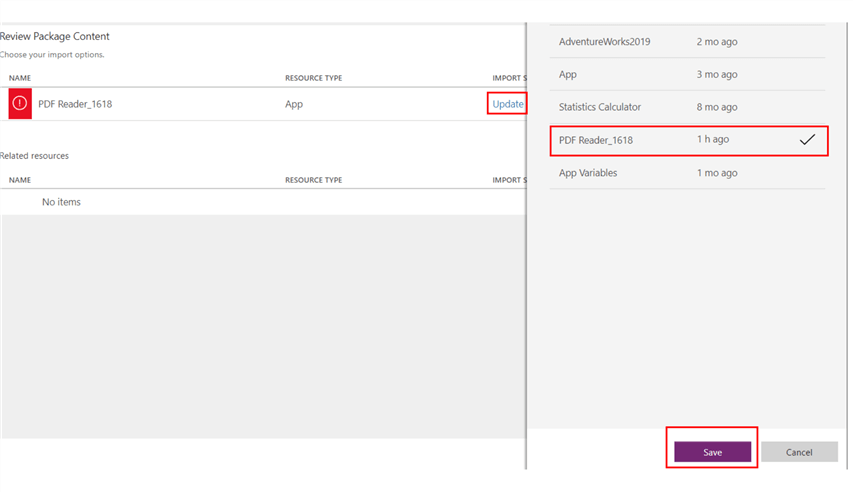
- You will get a summary screen, but the import button will be grayed out. Click on Update and select tour app’s name. Then click Save, then Import.
- Upon a successful import, pay attention to the message on top:

It means your changes (if any) are not live yet. You must open the app and make sure you publish this currently imported draft version.
Source control
Once you have the exported package, using in the source control system of your choice is obvious. You can commit the whole zip package, meaning you will have to export the app every time changes are published (no commandlet for that yet in the PP CLI). This process can be time consuming and everyone working on the app must be aware to do so.
In case you don’t need the extra source control on top of the basic ALM, you can use the package only when you need to, e.g. when changes in bulk are needed or when you want to export a specific screen. You can still use the direct export to .msapp file for one-way modifications, such as when you make all your edits in Studio but still want to use external source control.
Next Steps


About the author
 Hristo Hristov is a Data Scientist and Power Platform engineer with more than 12 years of experience. Between 2009 and 2016 he was a web engineering consultant working on projects for local and international clients. Since 2017, he has been working for Atlas Copco Airpower in Flanders, Belgium where he has tackled successfully multiple end-to-end digital transformation challenges. His focus is delivering advanced solutions in the analytics domain with predominantly Azure cloud technologies and Python. Hristo's real passion is predictive analytics and statistical analysis. He holds a masters degree in Data Science and multiple Microsoft certifications covering SQL Server, Power BI, Azure Data Factory and related technologies.
This author pledges the content of this article is based on professional experience and not AI generated.
View all my tips
Article Last Updated: 2021-09-02