By: Siddharth Mehta | Updated: 2010-02-08 | Comments (1) | Related: > Azure
Problem
SQL Azure and cloud computing brings a new paradigm of database development and implementation strategy. With these changes, all of the dependent technologies also have to start adapting to support this new paradigm. SSIS is one of the technologies that would be used to move data in and out of SQL Azure in any Microsoft Business Intelligence (BI) solution built on SQL Azure. In this tip, we would discuss how to use SQL Server Integration Services 2008 R2 to read and write data from SQL Azure.
Solution
SQL Azure can be seen as a light version of SQL Server on the Windows Azure cloud computing platform. To quickly come up to speed on how to create your account and database on SQL Azure, please read this tip which should bring you up to speed to get started for this tip. Please keep in mind that all the components and technologies discussed in this article uses SQL Server 2008 R2 (Nov CTP) version, so we would go with the assumption that SQL Server 2008 R2 Nov CTP (which is the latest release as of the draft of this article) is already installed on the development machine.
SQL Server Management Studio (SSMS) 2008 R2 has a fair amount of support for SQL Azure. To learn how to get started with the this topic, please read this tip. I am not mentioning these steps again, as they are already available in the tips suggested above and to keep focus on the main subject of this tip.
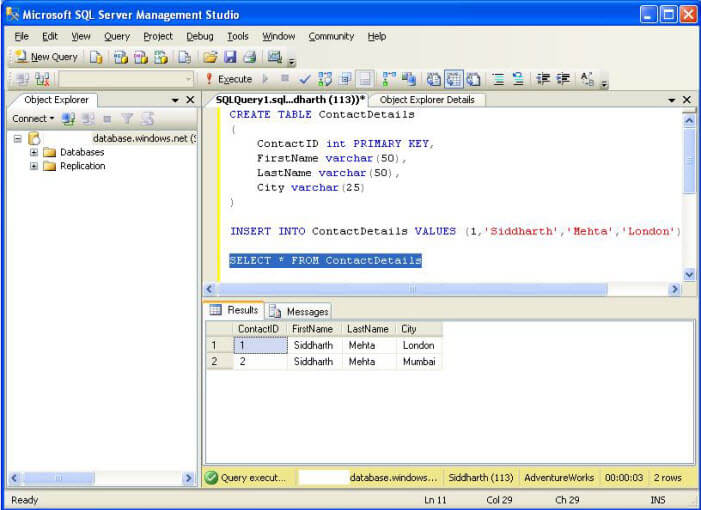
Create a database called AdventureWorks on your SQL Azure instance. Using SSMS connect to your account and open a new query window for your AdventureWorks database. Use the script shown below to create a table and insert some test records.
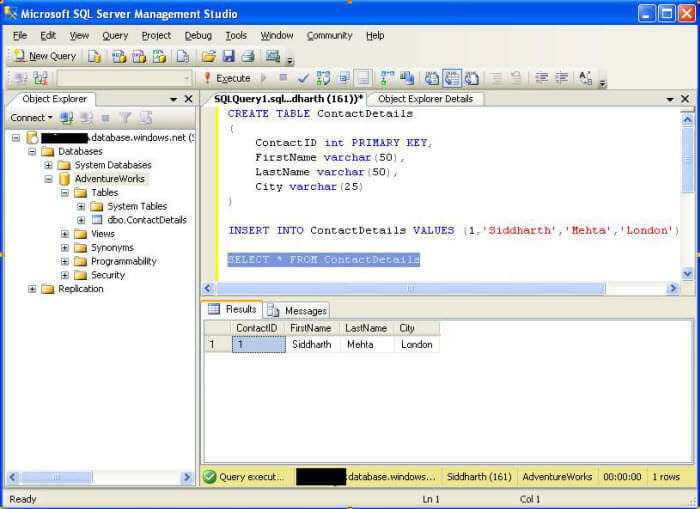
ADO.NET adapters have the required support to read and write in SSIS packages to SQL Azure instances. There are almost no enhancements for SSIS in the R2 version with the exception of a hidden gem in the ADO.Net Destination Adapter. It provides an option to Bulk Load data specifically for SQL Azure.
Follow the steps below to create a package that would read and write from the ContactDetails table on the SQL Azure instance.
1) Create an ADO.NET connection for the SQL Azure instance:
- Create a new SSIS project, and add a Data Flow Task to your package.
- If you are new to SSIS, check out this tutorial - SQL Server Integration Services Tutorial
- Edit the Data Flow, and create a new ADO.NET connection.
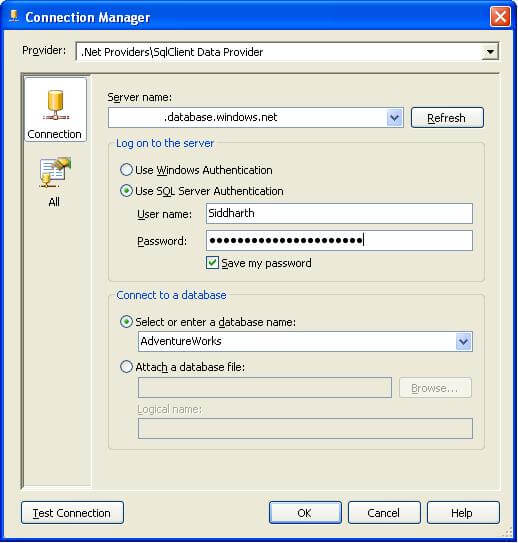
- Edit this connection, specify your server name which should be in servername.database.windows.net format.
- Select SQL Authentication. Type in your credentials to access the SQL Azure instance.
- Type in the name of the database as "AdventureWorks". Keep in mind that even if you test your connection and though it may be successful, you would not find the database drop-down populated with the name of databases.
2) Add ADO.NET Source and Destination Adapters
- Add a ADO.NET Source Adapter to read from SQL Azure ContactDetails table.
- Add a Derived column to modify the record.
- Add a ADO.NET Destination Adapter to connect to the table, and insert the modified record.
- Configure the above mentioned transforms as show in the figures below.
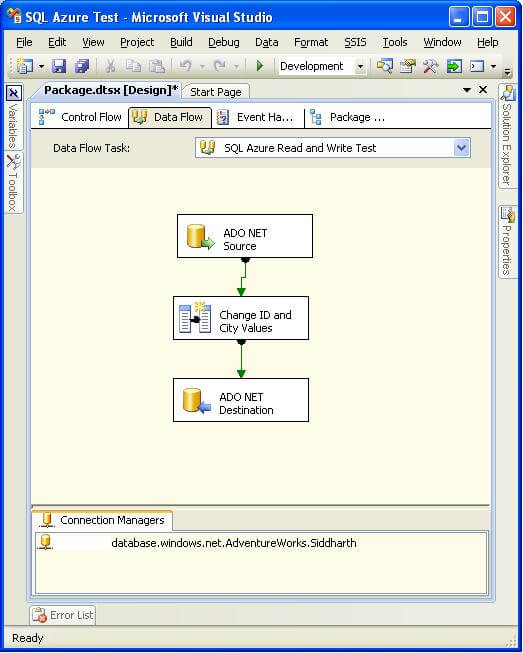
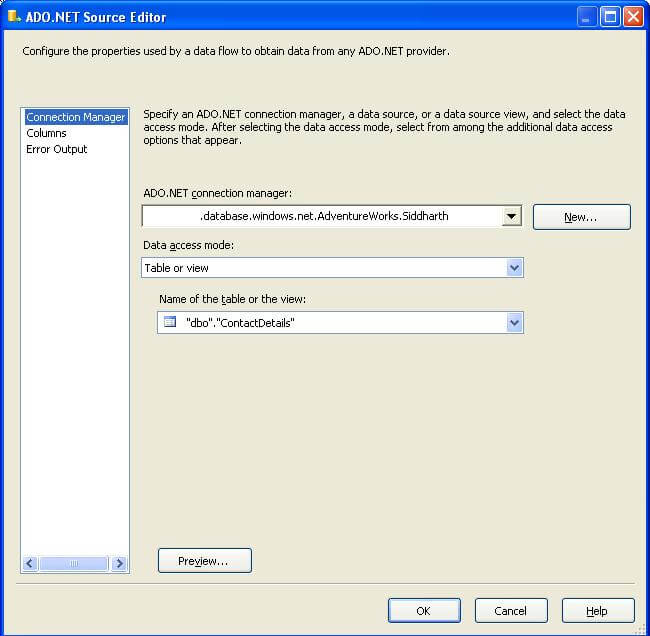
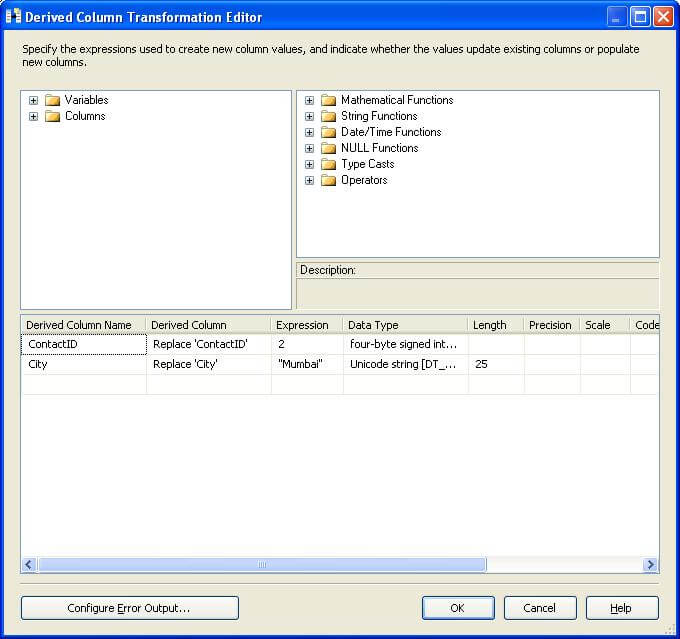
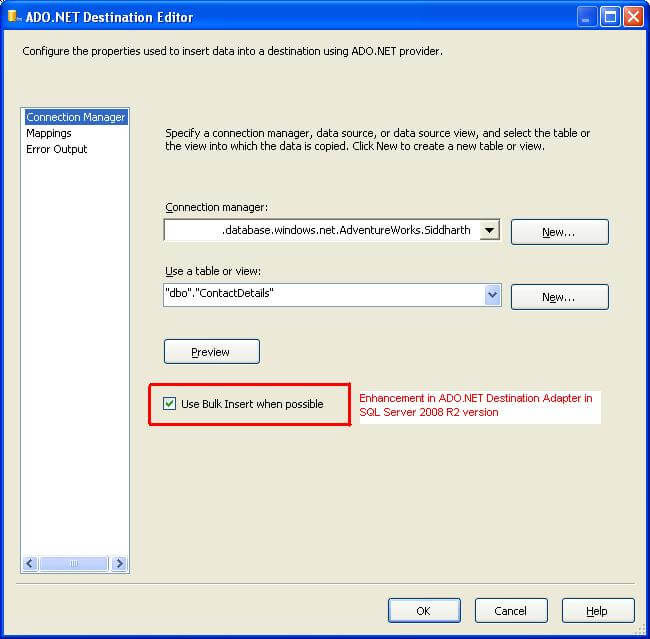
Execute the package. If the SSIS package is configured as explained above, the package should execute successfully and insert a record into ContactDetails table. Now go back to SSMS and reconnect to Object Explorer even if your SSMS window was open and connected before you developed this package. As a point of reference, if any connection is held for a long time (approx. anything more than 5 minutes), SQL Azure will terminate the connection. Check the records in the ContactDetails table and you should be able to see the record that we inserted into this table using our SSIS package.
Next Steps
- Download and install AdventureWorks database on to your Development SQL Server instance.
- Try to move some of the tables from the AdventureWorks database to your SQL Azure database using SSIS.
- Try moving delta records (changes) to SQL Azure would be an interesting scenario to test.
- Read the same delta values from SQL Azure and use it for loading into some other tables. This should help you to create a scenario in which you can move your staging area to SQL Azure.
- Check out these related tips:
About the author
 Siddharth Mehta is an Associate Manager with Accenture in the Avanade Division focusing on Business Intelligence.
This author pledges the content of this article is based on professional experience and not AI generated.
View all my tips
Article Last Updated: 2010-02-08


