By: Koen Verbeeck | Updated: 2017-08-25 | Comments | Related: > Analysis Services Development
Problem
One of the new features in Analysis Services 2016 is the ability to use Visual Studio Configuration in your Tabular project. Multidimensional projects already had this capability for some time, but now Tabular can benefit from this as well. In this tip, we’ll show you how you can use configurations to easily switch between servers as a target for deployment.
Solution
You can use Visual Studio configuration to create different sets of property values. When you change to a different configuration, the properties will change as well. This allows you for example to quickly change between servers when you want to deploy your Tabular model. Without configurations, you would have to type the server name in the model properties every time you want to change the destination of a deployment.
Visual Studio configurations are – as the name implies – only visible in Visual Studio. When you deploy your Tabular model to an Analysis Server (SSAS) instance, there won’t be any trace of them. They are a construct in Visual Studio to simplify builds and deployments.
Test set-up
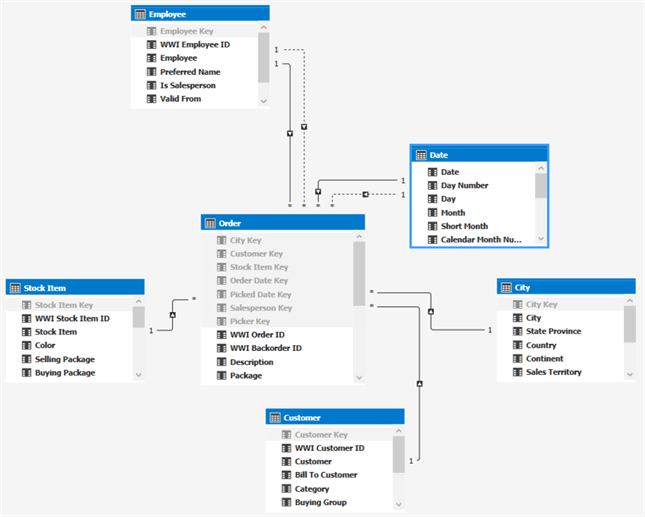
Before we can create configurations, we need a Tabular project of course. You can follow the steps outlined in the tip Using Calculated Tables in Analysis Services Tabular 2016 for Aggregate Tables – Part 3 to create a Tabular project using the Wide World Importers data warehouse.
Creating a New Configuration
By default there’s only one configuration present in a Visual Studio project: Development. You can quickly spot it in the solutions configurations drop down in the standard toolbar.

Let’s create a new configuration. This configuration will hold the name of the production server, so if we want to deploy to production instead of development we need to switch between configurations. Right-click on the model and go to properties. There we can go to the Configuration Manager.
In the Active solution configuration dropdown, you can click on New to create a new configuration.

In the pop-up, you need to specify a name. If you want, you can copy settings over from an existing configuration.
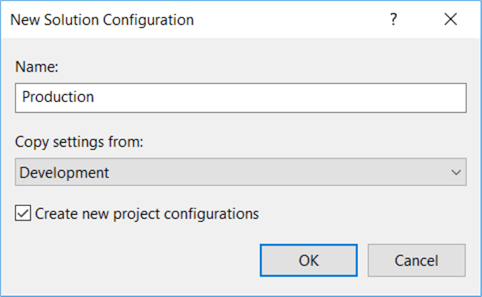
After clicking OK, the Production configuration will be created and is now the active configuration.
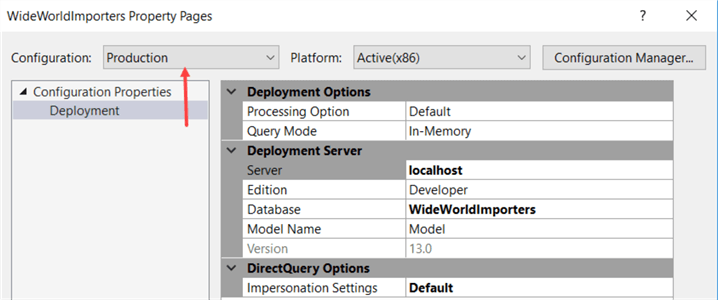
Link Properties to the Configuration
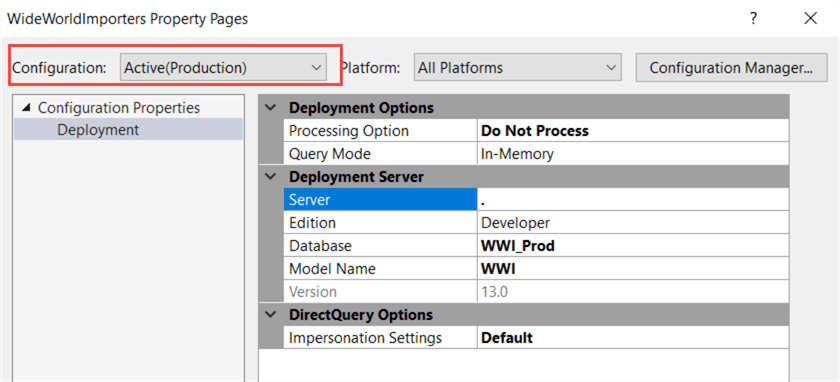
When we take a look at the deployment properties, we can see they have all the same default values as the Development configuration. Let’s change a couple to see the effect of a configuration.
- Processing Option will become Do not Process instead of Default.
- The server name will be a point instead of localhost (both are the same though).
- We will change the name of the database to WWI_Prod, just to see the effect. In normal scenarios you typically don’t change the name.
- We’re also going to change the name of the model in both development and production to WWI.
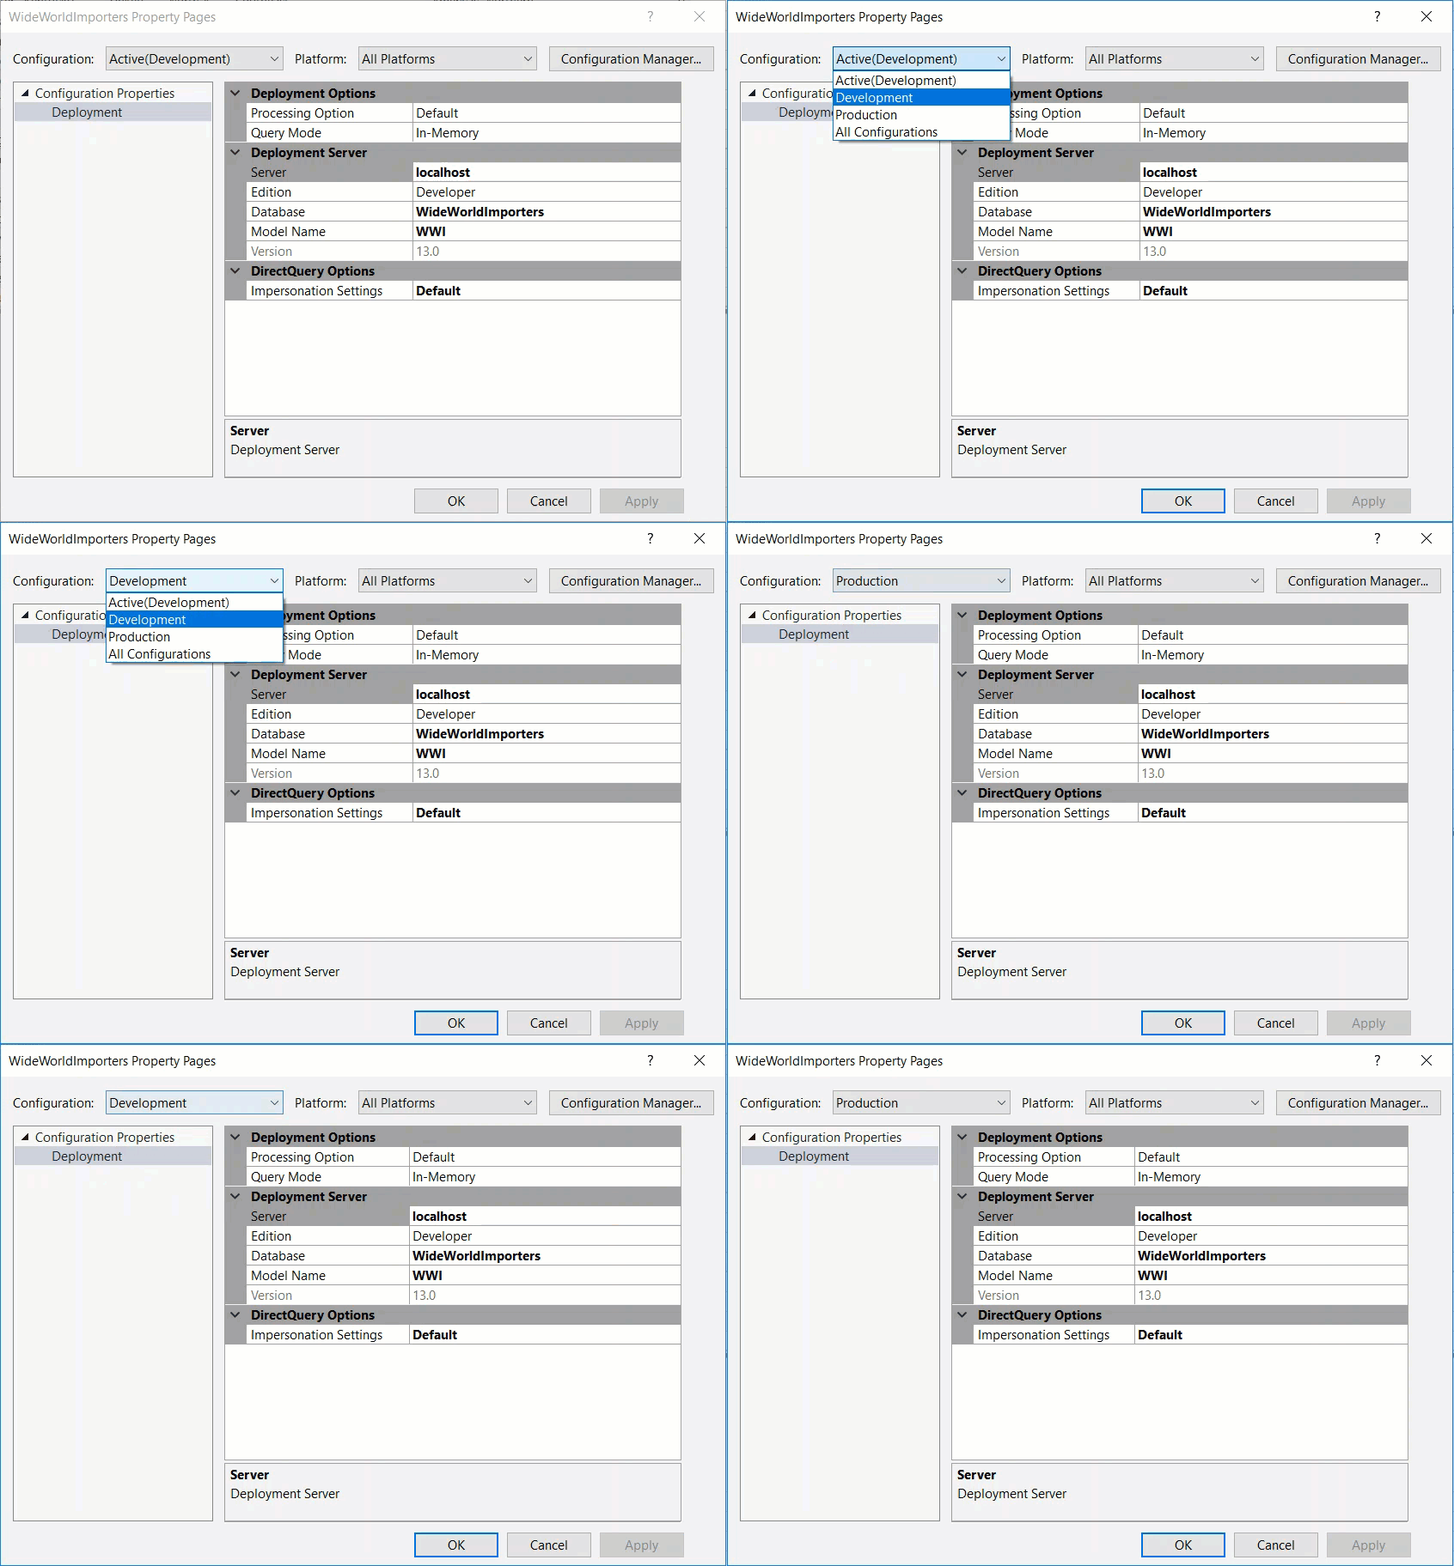
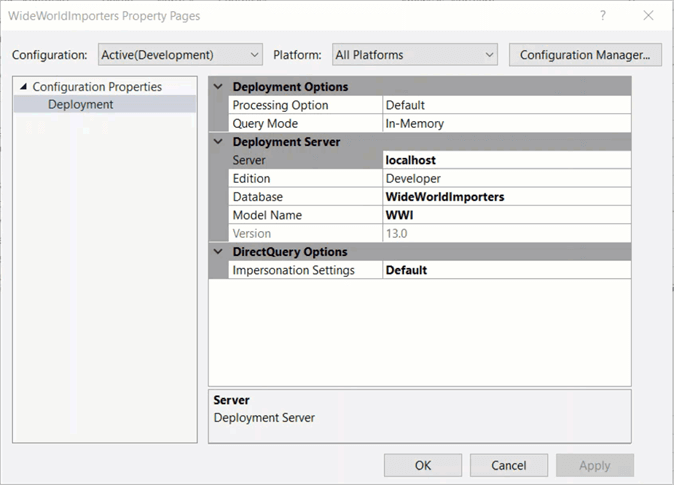
I have noticed changing properties for different configurations doesn’t always go as smooth as expected. When you’re in the properties window, you can change between configurations using the dropdown. However, the property values do not switch when you change configuration; only the properties for the active configuration are shown. This is tested behavior in SSDT 2015 and SSDT 2017. The following animated gif shows the problem:
So how do you change the properties? You can only change the properties for the active configuration. Follow these steps:
- You close the property pages.
- You set the configuration using the dropdown in the toolbar, thus changing the active configuration.
- You open the properties of the project again and you make your changes.
- Then you close the dialog again, change the active configuration and change the properties again if you need to.
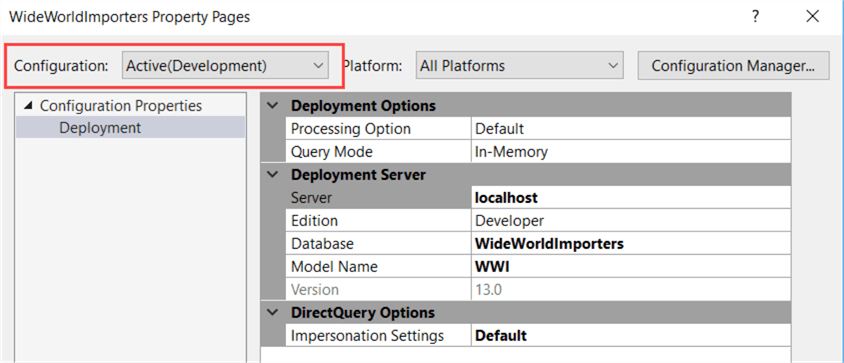
Here are the properties when Development is the active configuration:
And when Production is the active configuration:
Deploy using Different Configurations
It’s time to test the configurations. When deploying with Development as the active configuration, we get the following model on the Analysis Services instance:
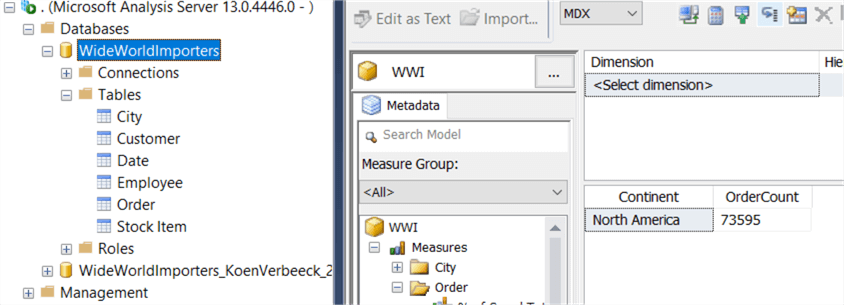
As you can see the data is already processed. When we change the configuration to Production and deploy the solution, we can see another model is added to the server:

This time, the model cannot be browser because the deployment was set to “Do Not Process”.
Conclusion
Using Visual Studio configurations, you can quickly change project properties. This can help you in easily deploying your SSAS Tabular solutions to different servers.
Next Steps
- You can also use configurations in your Integration Services projects. Check out the tip Using Visual Studio configurations in SQL Server Integration Services projects for more information.
- For all of the new features in Analysis Services 2016, check out What’s new in SSAS 2016 part 1 and part 2.
- You can find more Analysis Services tips in this overview.
- For more SQL Server 2016 tips, you can use this overview.
About the author
 Koen Verbeeck is a seasoned business intelligence consultant at AE. He has over a decade of experience with the Microsoft Data Platform in numerous industries. He holds several certifications and is a prolific writer contributing content about SSIS, ADF, SSAS, SSRS, MDS, Power BI, Snowflake and Azure services. He has spoken at PASS, SQLBits, dataMinds Connect and delivers webinars on MSSQLTips.com. Koen has been awarded the Microsoft MVP data platform award for many years.
This author pledges the content of this article is based on professional experience and not AI generated.
View all my tips
Article Last Updated: 2017-08-25


