By: Nat Sundar | Comments (2) | Related: 1 | 2 | 3 | > Integration Services Administration
Problem
The previous tip helped you deploy a single SQL Server Integration Services (SSIS) project to a SSIS server. However an organization will always have multiple SSIS projects based on business needs. So it is mandatory to extend the solution further, to deploy multiple SSIS projects using a simple windows application based on C#.
Solution
In this tip, I will walkthrough a few simple methods to extend the capability of the Windows application which was developed in the previous tip.
Prerequisite
It is assumed that the reader has already gone thru the previous tip to familiarize themselves with the basics about developing a Windows application for SSIS deployment.
Deleting the Catalog
It is always recommended for a clean deployment to delete the catalog. This means, we need to delete all the existing folders and projects before deploying SSIS projects. This will help us investigate if there are any failures during the deployment. As a first step to achieve clean a deployment, we need to delete the entire catalog.
Warning! If we are running this script against a test environment, it will delete all the catalog contents (Folder, Projects and Environments). So please provide enough attention, before executing this script against a target environment. Please comment out relevant sections of the code if you don't want to drop the catalog and want to continue the deployment with the existing SSIS Catalog.
Code to Delete SSIS Catalog
The below code will help you delete the entire catalog. An Integration Services object has been created with a SQL connection. Using this Integration Services object, we can validate whether any catalog is available in the SSIS server. If there are any catalogs in the SSIS server, then we can create a catalog object by calling the "Catalogs" function and passing the name of the catalog (SSISDB). Once we have created the catalog object reference, the catalog can be deleted using the Drop function as mentioned below in the code. The code / Windows application can be executed by pressing F5 or using the Debug menu and the Start Debugging sub menu.
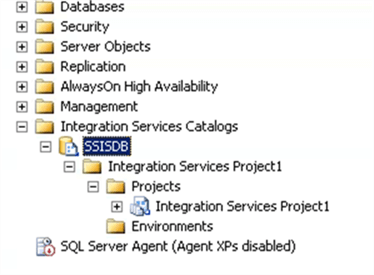
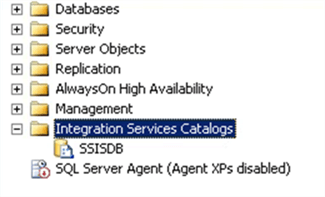
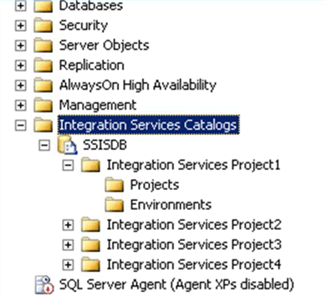
The target server has a SSIS catalog and it has one SSIS project in a folder.
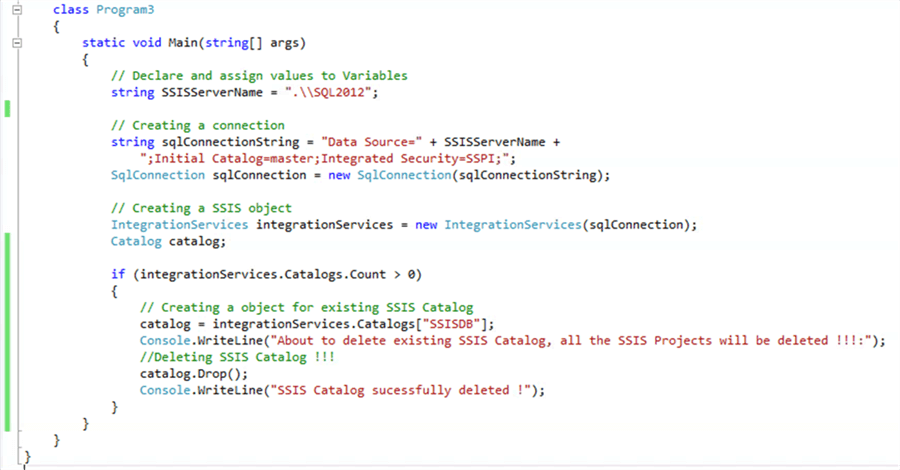
The C# code to delete the entire catalog is below.
// Declare and assign values to Variables
string SSISServerName = ".\\SQL2012";

// Creating a connection
string sqlConnectionString = "Data Source=" + SSISServerName +
   ";Initial Catalog=master;Integrated Security=SSPI;";
SqlConnection sqlConnection = new SqlConnection(sqlConnectionString);

// Creating a SSIS object
IntegrationServices integrationServices = new IntegrationServices(sqlConnection);
Catalog catalog;

if (integrationServices.Catalogs.Count > 0)
{
   // Creating a object for existing SSIS Catalog
  catalog = integrationServices.Catalogs["SSISDB"];
  Console.WriteLine("About to delete existing SSIS Catalog, all the SSIS Projects will be deleted !!!:");
  //Deleting SSIS Catalog !!!
  catalog.Drop();
  Console.WriteLine("SSIS Catalog successfully deleted !");
}
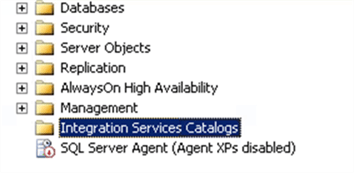
After the execution of the C# code, we can confirm that the entire SSIS catalog has been removed.
Creating an SSIS Catalog
As we have successfully deleted the SSIS catalog, now we have to create the SSIS catalog. The SSIS catalog protects data using encryption. Hence SSIS needs a password to protect the encryption key. We need to supply a password while creating the SSIS catalog. I have created two new variables to store SSISCatalogName and the CatalogPassword.
The below code is creating a catalog object using the Integration Services object, SSIS Catalog name and the Catalog password. Once the catalog object has been created, we can create the actual catalog using the "Create" method in the code below.
// Declare and assign values to Variables
string SSISServerName = ".\\SQL2012";
string SSISCatalogName = "SSISDB";
string SSISCatalogPassword = "Pwd$1234";

// Creating a connection
string sqlConnectionString = "Data Source=" + SSISServerName +
   ";Initial Catalog=master;Integrated Security=SSPI;";
SqlConnection sqlConnection = new SqlConnection(sqlConnectionString);

// Creating a SSIS object
IntegrationServices integrationServices = new IntegrationServices(sqlConnection);
Catalog catalog;

if (integrationServices.Catalogs.Count > 0)
{
   // Creating a object for existing SSIS Catalog
   catalog = integrationServices.Catalogs["SSISDB"];
   Console.WriteLine("About to delete existing SSIS Catalog, all the SSIS Projects will be deleted !!!:");
   //Deleting SSIS Catalog !!!
   catalog.Drop();
   Console.WriteLine("SSIS Catalog successfully deleted !");

   //Creating SSIS Catalog using the Catalog name and the Password
   catalog = new Catalog(integrationServices, SSISCatalogName, SSISCatalogPassword);
   catalog.Create();
   Console.WriteLine("SSIS Catalog has been successfully created ");
}
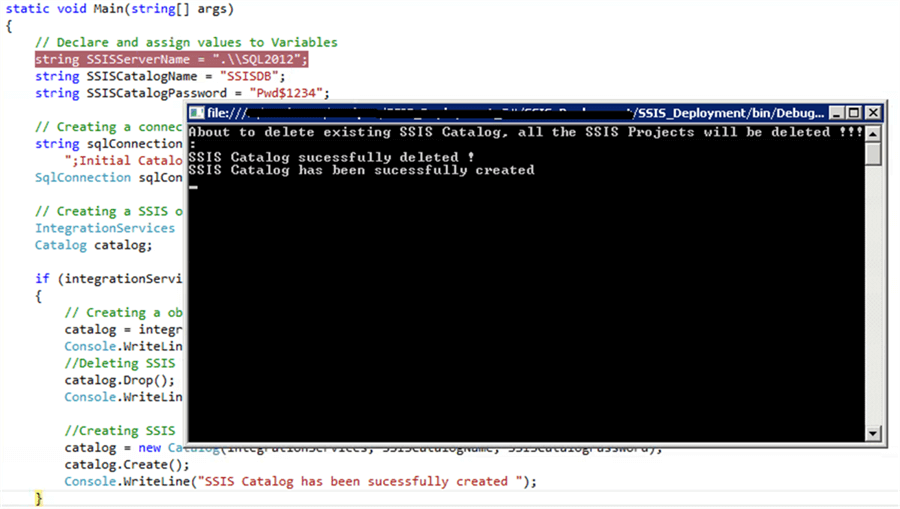
After executing the code, it has been confirmed that the SSIS catalog has been re-created.
Deploying multiple SSIS Projects
Let's assume we have four SSIS projects and these projects are available in four sub folders ("Integration Services Project1","Integration Services Project2","Integration Services Project3" & "Integration Services Project4").
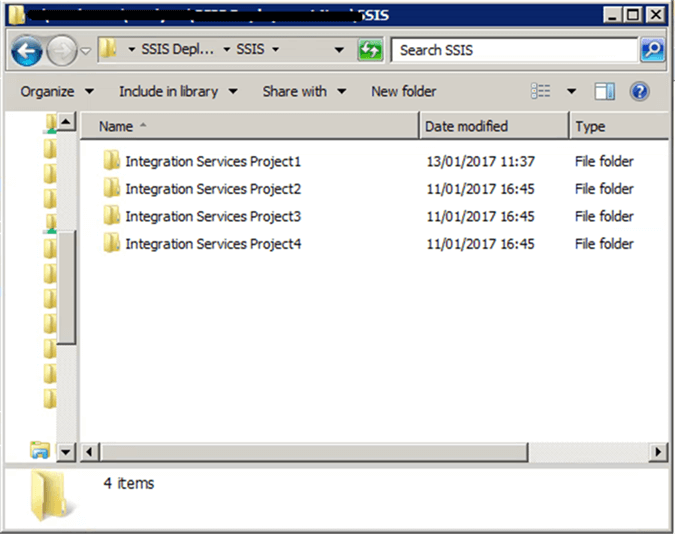
It is assumed that all the projects have been built and the ISPAC file for each project has been generated. Each sub folder contains the SSIS deployment file (ISPAC file).
During the deployment, we need to iterate thru the folders and search for the ISPAC file. In addition, we need to create a folder for each ISPAC file and then we need to deploy the SSIS project.
Search for Deployment File
As a first step, let’s iterate thru the folder and search for the ISPAC file and print the full name of the ISPAC file. To achieve this requirement, I have enhanced the C# code.
I will be using the Directory.GetFiles function to search for the file with the extension ".ISPAC" in a given path. There is also an optional parameter to search for subfolders as well.
This GetFiles function will return an array of file names (including the full path) based on the match. Using the foreach loop, I am able to parse individual file name and I can print the name of the file in the below code.
// Declare and assign values to Variables
string SSISServerName = ".\\SQL2012";
string SSISCatalogName = "SSISDB";
string SSISCatalogPassword = "Pwd$1234";
string SSISProjectFilePath = @"C:\SSIS Deployment New\SSIS";

// Creating a connection
string sqlConnectionString = "Data Source=" + SSISServerName +
   ";Initial Catalog=master;Integrated Security=SSPI;";
SqlConnection sqlConnection = new SqlConnection(sqlConnectionString);

// Creating a SSIS object
IntegrationServices integrationServices = new IntegrationServices(sqlConnection);
Catalog catalog;

if (integrationServices.Catalogs.Count > 0)
{
   // Creating a object for existing SSIS Catalog
   catalog = integrationServices.Catalogs["SSISDB"];
   Console.WriteLine("About to delete existing SSIS Catalog, all the SSIS Projects will be deleted !!!:");
   //Deleting SSIS Catalog !!!
   catalog.Drop();
   Console.WriteLine("SSIS Catalog successfully deleted !");

   //Creating SSIS Catalog using the Catalog name and the Password
   catalog = new Catalog(integrationServices, SSISCatalogName, SSISCatalogPassword);
   catalog.Create();
   Console.WriteLine("SSIS Catalog has been successfully created ");


   string[] fileList = Directory.GetFiles(SSISProjectFilePath, "*.ispac", SearchOption.AllDirectories);
   foreach (string file in fileList)
   {
      Console.WriteLine("ISPAC File Name" + file);
   }
}
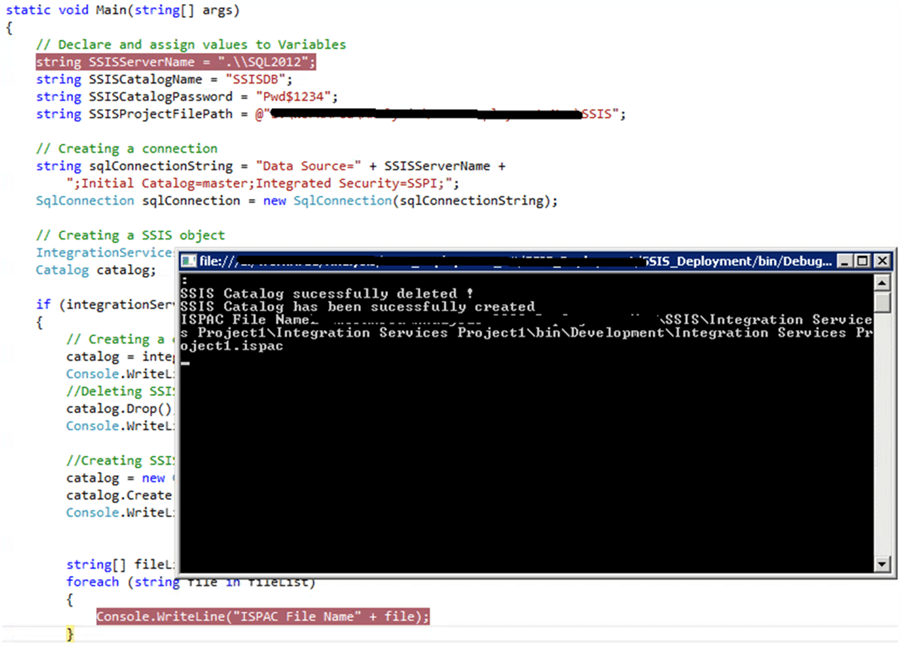
It is confirmed that the first available ISPAC file has been found and listed in the console.
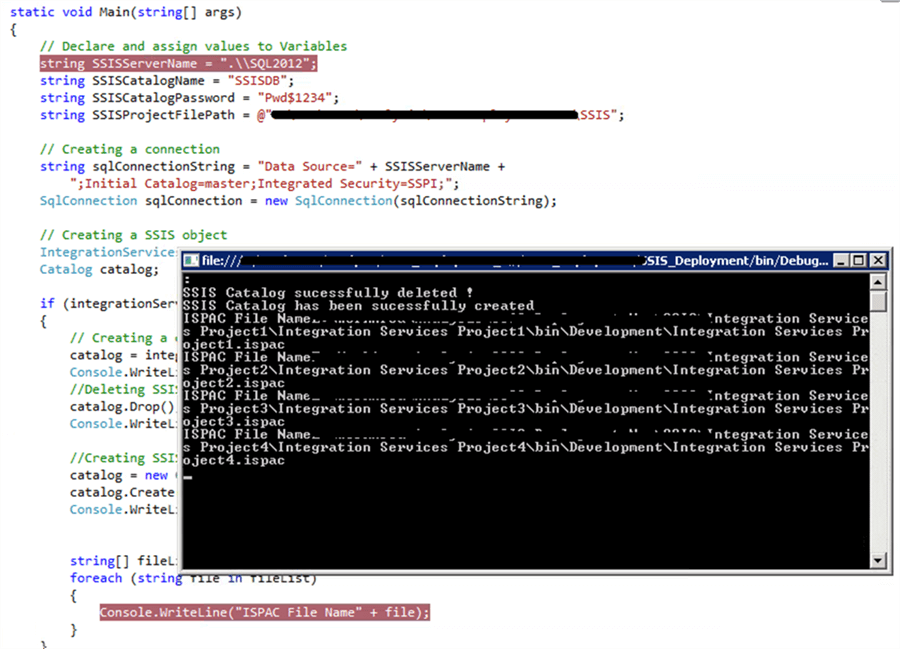
It is confirmed that all the available ISPAC files have been found and listed in the console.
Creating a Folder for Each ISPAC File
As a next step in the deployment process, we need to create a folder for each SSIS project. The name of the folder can be derived from the name of the ISPAC file. Let’s enhance the code further to create a folder for each ISPAC file.
I have created another variable to store the reference for the CatalogFolder. The name of the folder can be derived from the actual ISPAC file. I am using the GetFileNameWihoutExtension method to get the name of the ISPAC file from the actual file path. This filename can then be used to create the folder. A Catalog folder object can be created in the Catalog using the constructor "CatalogFolder" by passing the parameters Catalog Reference and the FolderName.
The Catalog Folder can be created by calling the "Create" method in the Catalog Folder object.
// Declare and assign values to Variables
string SSISServerName = ".\\SQL2012";
string SSISCatalogName = "SSISDB";
string SSISCatalogPassword = "Pwd$1234";
string SSISProjectFilePath = @"C:\SSIS";
string SSISFolderName = "";

// Creating a connection
string sqlConnectionString = "Data Source=" + SSISServerName +
   ";Initial Catalog=master;Integrated Security=SSPI;";
SqlConnection sqlConnection = new SqlConnection(sqlConnectionString);

// Creating a SSIS object
IntegrationServices integrationServices = new IntegrationServices(sqlConnection);
Catalog catalog;

if (integrationServices.Catalogs.Count > 0)
{
   // Creating a object for existing SSIS Catalog
   catalog = integrationServices.Catalogs["SSISDB"];
   Console.WriteLine("About to delete existing SSIS Catalog, all the SSIS Projects will be deleted !!!:");
   //Deleting SSIS Catalog !!!
   catalog.Drop();
   Console.WriteLine("SSIS Catalog successfully deleted !");

   //Creating SSIS Catalog using the Catalog name and the Password
   catalog = new Catalog(integrationServices, SSISCatalogName, SSISCatalogPassword);
   catalog.Create();
   Console.WriteLine("SSIS Catalog has been successfully created ");

   CatalogFolder folder;

   string[] fileList = Directory.GetFiles(SSISProjectFilePath, "*.ispac", SearchOption.AllDirectories);
   foreach (string file in fileList)
   {
      Console.WriteLine("ISPAC File Name" + file);
      SSISFolderName = Path.GetFileNameWithoutExtension(file);

      // Creating a object for SSIS folder
      folder = new CatalogFolder(catalog, SSISFolderName, SSISFolderName);
      folder.Create();
      Console.WriteLine("SSIS Catalog folder " + SSISFolderName + " has been created !!!:");
   }
}
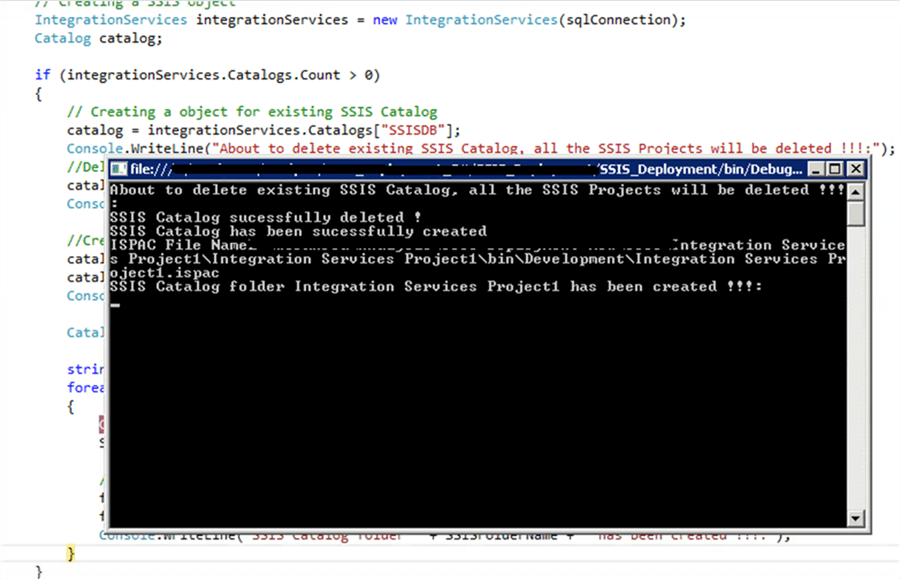
It is confirmed that the all the folders for the SSIS catalogs have been created.
As we have created the folder, it’s easy enough to deploy the SSIS project. Now we can read each ISPAC file using Read.ReadAllBytes function. This function returns a byte array. The ISPAC file can be deployed using the DeployProject function in the Catalog Folder object by passing the Folder name and the ISPAC file.
// Declare and assign values to Variables
string SSISServerName = ".\\SQL2012";
string SSISCatalogName = "SSISDB";
string SSISCatalogPassword = "Pwd$1234";
string SSISProjectFilePath = @"C:\SSIS";
string SSISFolderName = "";

// Creating a connection
string sqlConnectionString = "Data Source=" + SSISServerName +
   ";Initial Catalog=master;Integrated Security=SSPI;";
SqlConnection sqlConnection = new SqlConnection(sqlConnectionString);

// Creating a SSIS object
IntegrationServices integrationServices = new IntegrationServices(sqlConnection);
Catalog catalog;

if (integrationServices.Catalogs.Count > 0)
{
   // Creating a object for existing SSIS Catalog
   catalog = integrationServices.Catalogs["SSISDB"];
   Console.WriteLine("About to delete existing SSIS Catalog, all the SSIS Projects will be deleted !!!:");
   //Deleting SSIS Catalog !!!
   catalog.Drop();
   Console.WriteLine("SSIS Catalog successfully deleted !");

   //Creating SSIS Catalog using the Catalog name and the Password
   catalog = new Catalog(integrationServices, SSISCatalogName, SSISCatalogPassword);
   catalog.Create();
   Console.WriteLine("SSIS Catalog has been successfully created ");

   CatalogFolder folder;

   string[] fileList = Directory.GetFiles(SSISProjectFilePath, "*.ispac", SearchOption.AllDirectories);
   foreach (string file in fileList)
   {
      Console.WriteLine("ISPAC File Name" + file);
      SSISFolderName = Path.GetFileNameWithoutExtension(file);

      // Creating a object for SSIS folder
      folder = new CatalogFolder(catalog, SSISFolderName, SSISFolderName);
      folder.Create();
      Console.WriteLine("SSIS Catalog folder " + SSISFolderName + " has been created !!!:");

      Console.WriteLine("Deploying " + SSISFolderName + " project.");

      byte[] projectFile = File.ReadAllBytes(file);
      folder.DeployProject(SSISFolderName, projectFile);
      Console.WriteLine("SSIS Project has been successfully deployed !");
   }
}

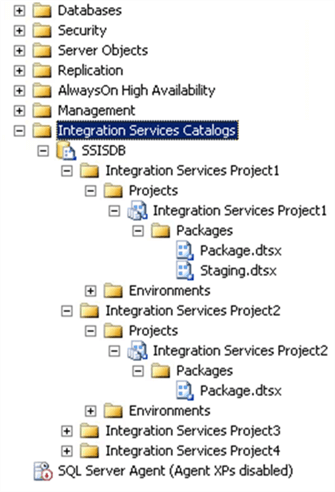
It is confirmed that the all the SSIS projects have been deployed successfully in the Catalog.
Summary
In this tip we have learned how to enhance the simple Windows application to deploy multiple SSIS projects.
Next Steps
- Stay tuned to read about deploying multiple SSIS projects using the command line with arguments in the next tip.
- Read other SSIS tips here.
- Read about SSIS Project Deployment Basics here.


About the author
 Nat Sundar is working as an independent SQL BI consultant in the UK with a Bachelors Degree in Engineering.
This author pledges the content of this article is based on professional experience and not AI generated.
View all my tips